Vtiger Calendar – what is it?
Vtiger CRM provides a single, unified CRM for sales, customer support and marketing teams. Vtiger CRM can be deployed across the entire customer lifecycle and enables marketing teams to capture and nurture leads, sales teams to evaluate, track and close resulting deals and support teams to access complete customer history and provide support.
Key features include web forms, email and SMS campaigns, lead scoring, sales insights, appointment scheduling, approvals, team mailbox, document tracking, automated workflows, work orders, inventory management, case routing, surveys and project management. All customer data is stored in a single database that provides a unified view for marketing, sales and support teams.
NOTE : Chat Agents also integrates natively with Vtiger CRM for chat leads, so you can automatically send information between Chat Agents and Lawcus – no code required.
 Chat Agents
How to get started with Vtiger Calendar & Chatagents.com.
To schedule appointments on your behalf in Vtiger Calendar, our agents need access to your public Vtiger Calendar page. All we need is the direct link to your Vtiger Calendar page.
The following steps will show you how to set up your calendar and retrieve and share your direct calendar link with us.
If you do not already have a Vtiger CRM account, sign up for a free trial at https://crmaccess.vtiger.com/begin-free-trial/, or log in at https://crmaccess.vtiger.com/log-in/ if you already have a Vtiger account.
Once you have completed the signup and logged in, you’ll be guided through a series of steps and helpful video demos to complete the CRM setup.
How to create Appointment Pages in Vtiger
Vtiger’s appointment pages make the task of scheduling online appointments with your clients easier.
The following steps demonstrate how to set up your appointment pages in just a few clicks with Vtiger
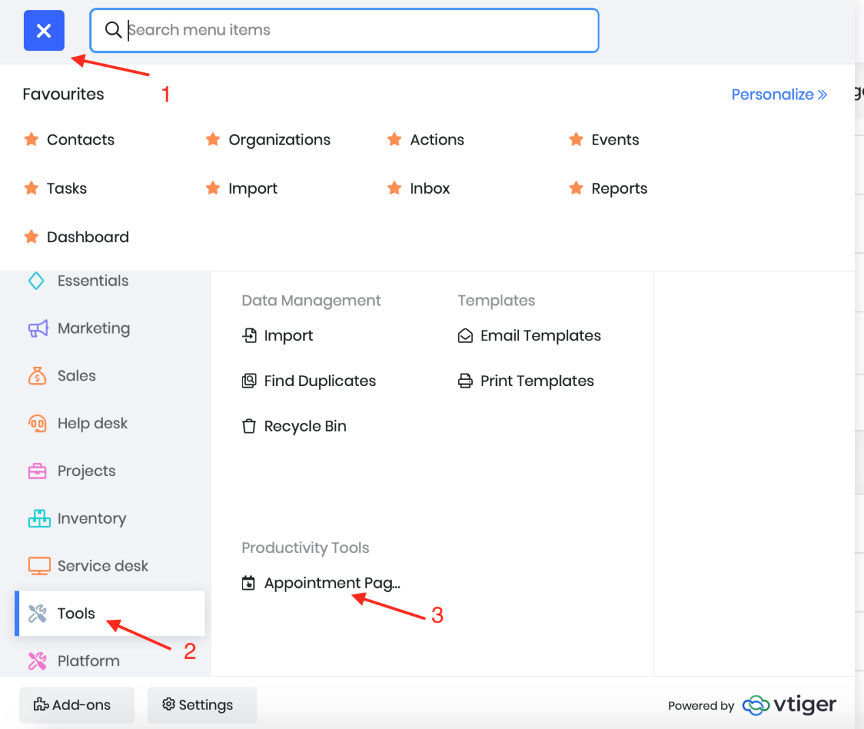
In your Dashboard, click on the Actions menu on the left side > Tools > Appointment Pages.
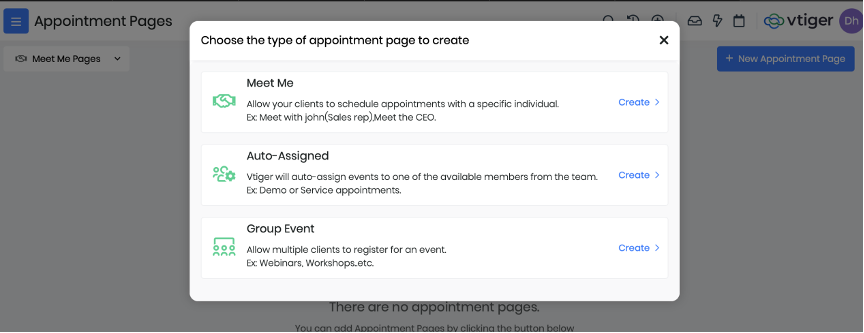
Click New Appointment Page
You can set up 3 different types of Appointment Pages
A) Meet Me – lets your customers schedule a one on one appointment with you
B) Auto-assigned – assigns the meeting to one of the available members on your team
C) Group Event – allows multiple customers to register for a meeting.
For the purpose of this demo, we will create a one-to-one appointment.
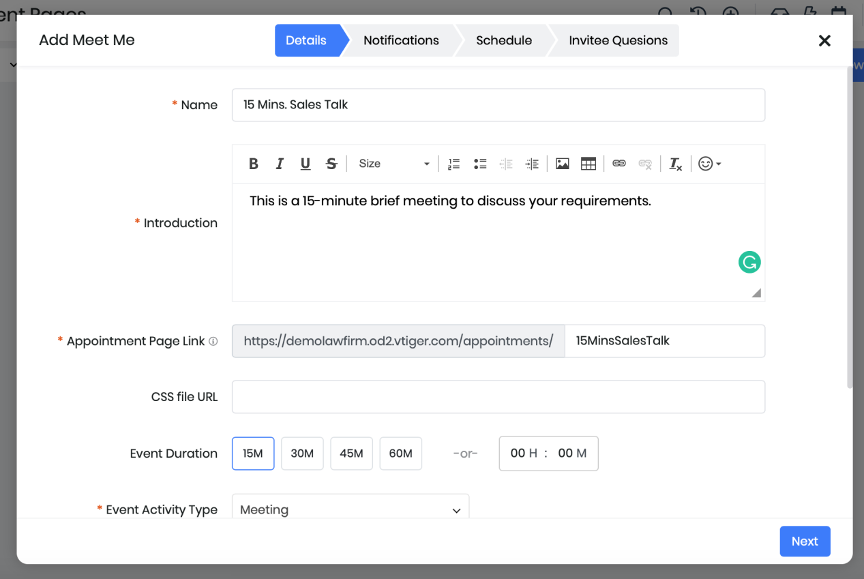
Fill in the details of the appointment
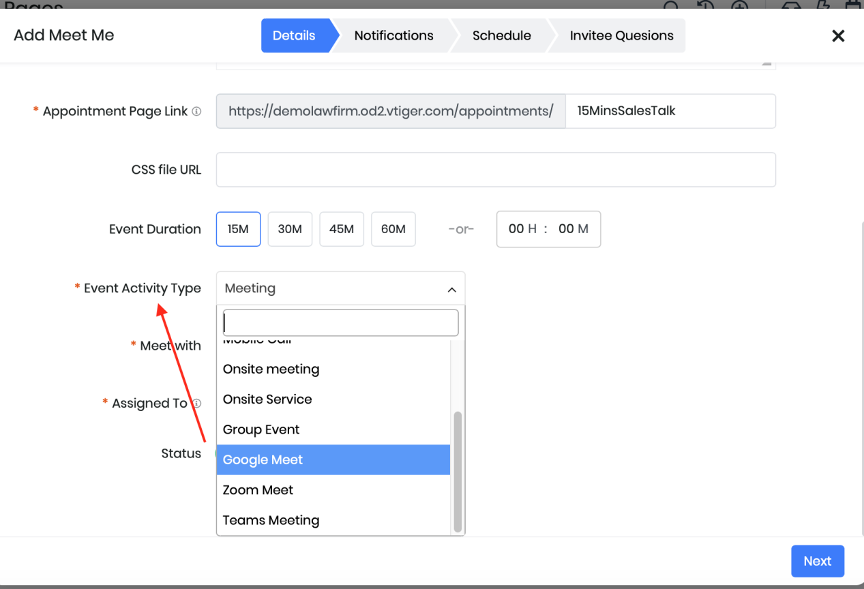
In Event Activity Type, carefully select the meeting options from the dropdown list, which can be an onsite service, a meeting, a call, or an online video meeting such as Google Meet, Zoom, or Teams.
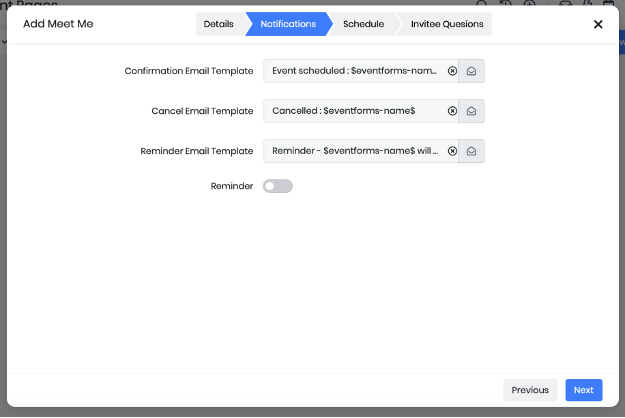
Choose your event notification options
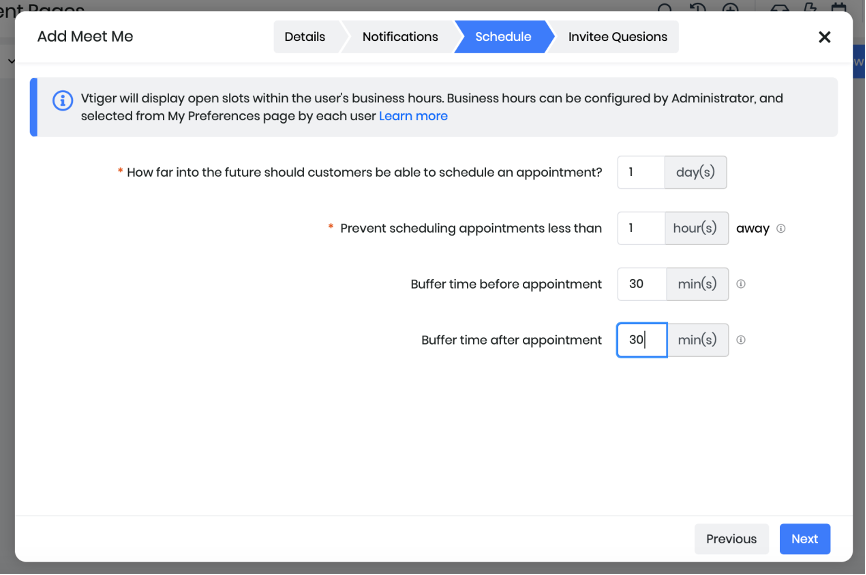
Set up additional parameters such as buffer time before and after the appointment, time difference between 2 appointments, and others.
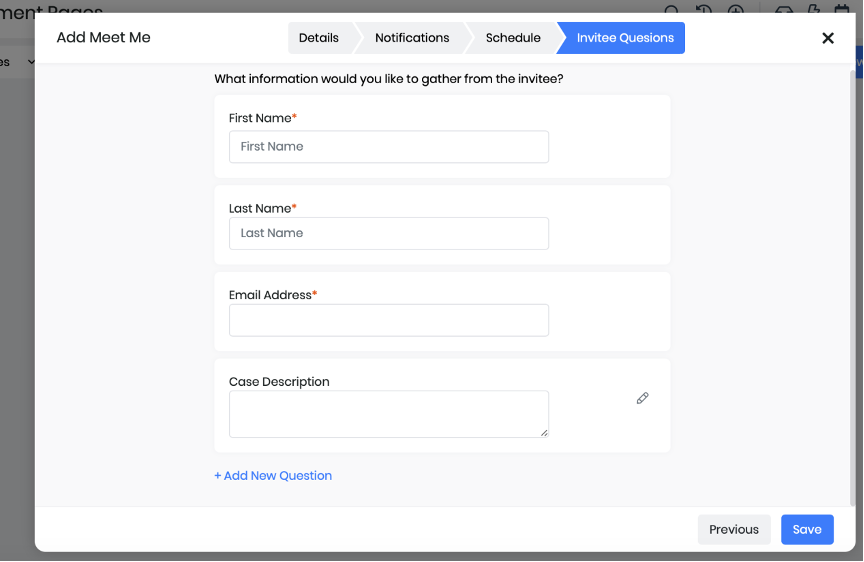
Create the request form for Invitee Questions. Click Save when you are done.
You should now see your newly created appointment page with its page link.

Note: If you have more than 1 appointment page that you want Chat Agents to schedule the appointment for, copy the links for all pages.
How to sync your Appointment Calendar with third-party calendars
Since we are dealing with appointment calendar, it is also important to know how to keep your other calendar apps like GMail, Office 365, Quickbooks connected to Vtiger by enabling real-time syncing.
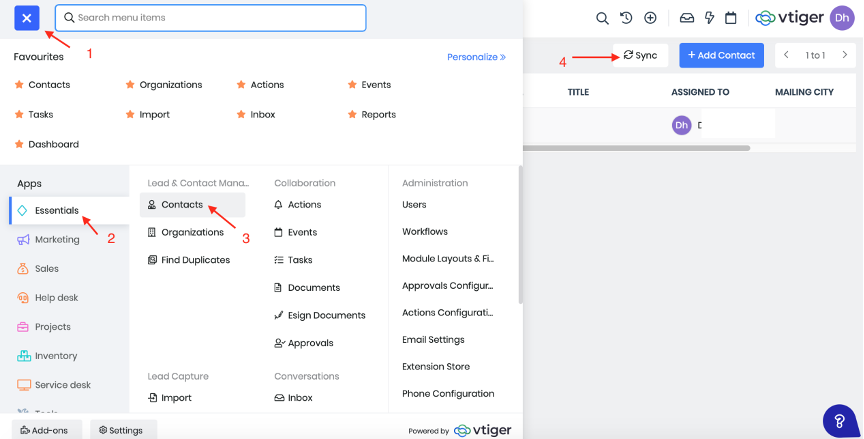
To do this, go to the Action menu in the left pane of your Dashboard > Apps >Essentials >Contacts >Sync
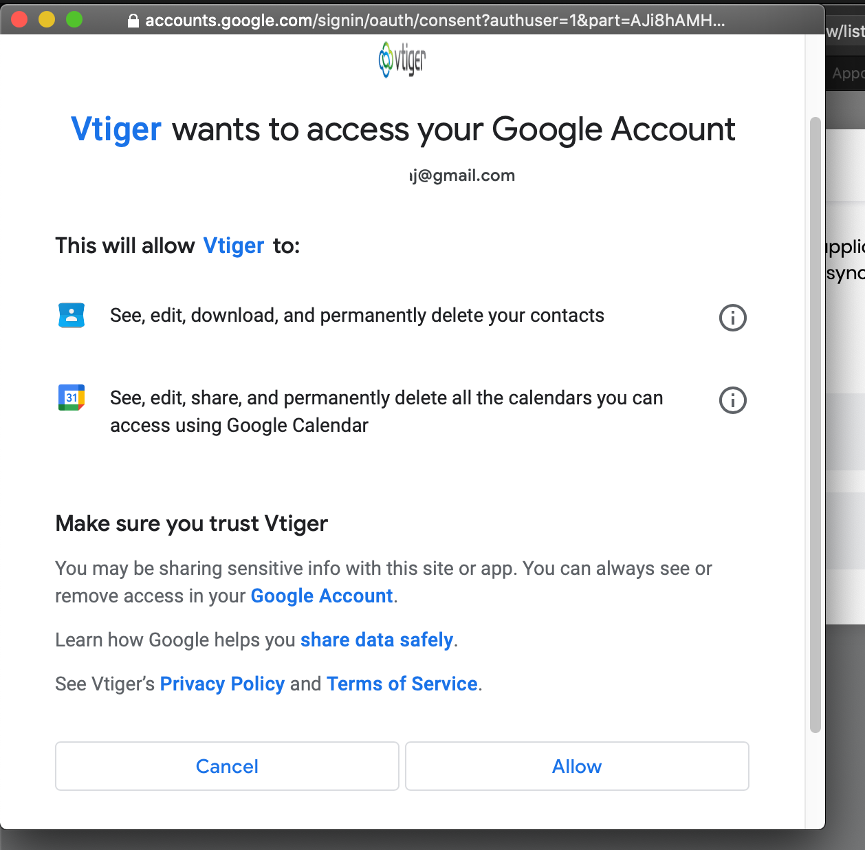
Contacts and Calendar in Vtiger are synced with Google and Office365 apps.

Log in to the respective app and grant Vtiger access to manage contacts and calendars
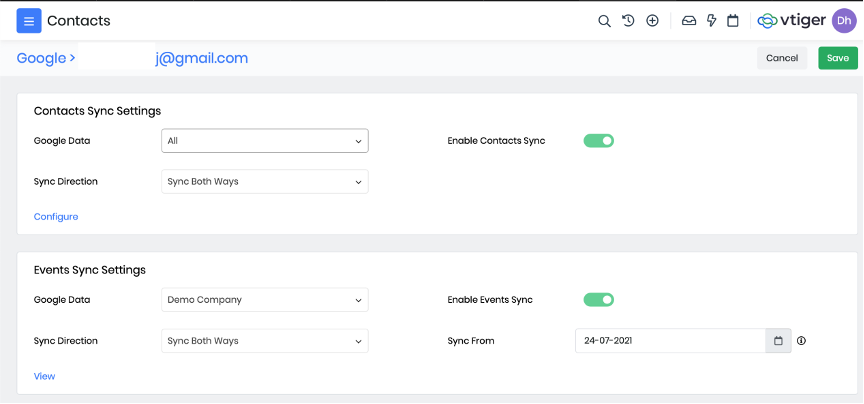
Choose your sync options such as one-way or two-way sync, contact and event sync and sync start date.
Save the changes. That’s it.
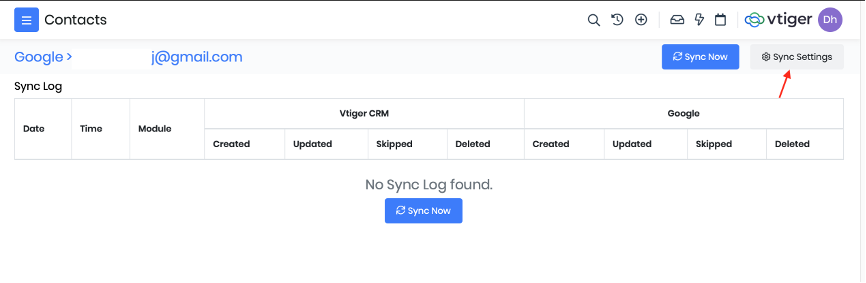
Your third party calendar and contacts are now synced with Vtiger. You can always visit Sync Settings located on the top right of the sync page to change the settings in the future.
How to send your Appointment page links to Chatagents.com
Please share your booking calendar links by logging into the integration page of your Chat Agents account.
To do this, go to https://my.chatagents.com/ in your Chat Agents dashboard and go to “Integrations,” which should open https://my.chatagents.com/integrations.
Look for Vtiger Calendars and check the “Activate” box.
Then click on the “Help Icon” next to activate and a form should open.
Paste the links you copied from Vtiger Calendars and any messages or special instructions you want to send to our chat agents into this form.
Once you have done this, our support team will set it up, usually within 24 hours. Once set up, our chat agents can now start scheduling appointments, either by sharing the link with chat visitors so they can book an appointment with you, or by asking for the details and scheduling your appointment for them.
If you have any questions or need help integrating Vtiger Calendars or other apps with your Chat Agents account, please contact us through the help section on your Chat Agents dashboard – we will be happy to do it for you, at no additional cost.