
Keap- what is it?
Keap (formerly Infusionsoft) is a cloud-based sales and marketing solution that combines CRM, marketing and sales automation, and payments in one platform.
Keap helps small businesses across various industries streamline sales and manage customer experiences.
Capture leads and organize them in one place. With Keap, you have one place for your lead capture, customer information, email and SMS campaigns, calendar bookings, invoices and payments, and more.
NOTE : Chat Agents also integrates natively with Keap CRM for chat leads, so you can automatically send information between Chat Agents and Keap CRM – no code required.
 Chat Agents
How Chatagents.com can help you schedule appointments with Keap
If you are using Keap as a CRM tool for your business, Chat Agents can help you take care of some of the routine tasks like scheduling appointments for you. Keap offers you Appointment Scheduler to schedule meetings professionally and efficiently , eliminating the hassle of sending emails back and forth.
How to get started with Keap Appointment Scheduler & Chatagents.com.
To schedule appointments on your behalf in Keap Meeting Scheduler, our agents need access to your public appointment page. All we need is the direct link of your appointment page.
The following steps will show you how to set up your appointment scheduler, sync it with third party calendars and share your direct scheduling link with us.
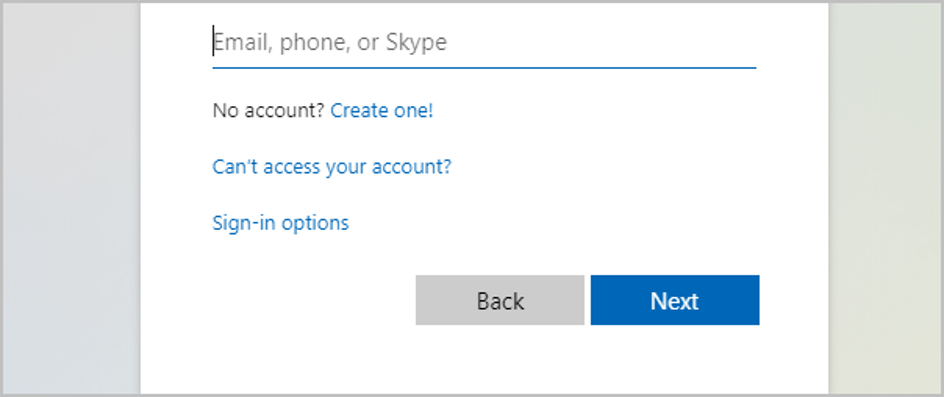
If you do not already have a Keap account, sign up for a free trial at https://try.keap.com/, or sign in at https://signin.infusionsoft.com if you already have a Keap account.
Once you have completed the signup and logged in, you’ll be guided through a series of steps and instructions to complete the CRM setup.
How to sync your Keap Appointment scheduler with Google or Outlook Calendar
On the appointment booking page, your clients can choose a time that works best for both parties by blocking out the days you are unavailable and searching your multiple Google or Microsoft calendars to eliminate conflicts, leaving only time slots that are truly available.
How to connect Keep Appointment Scheduler with Google Calendar
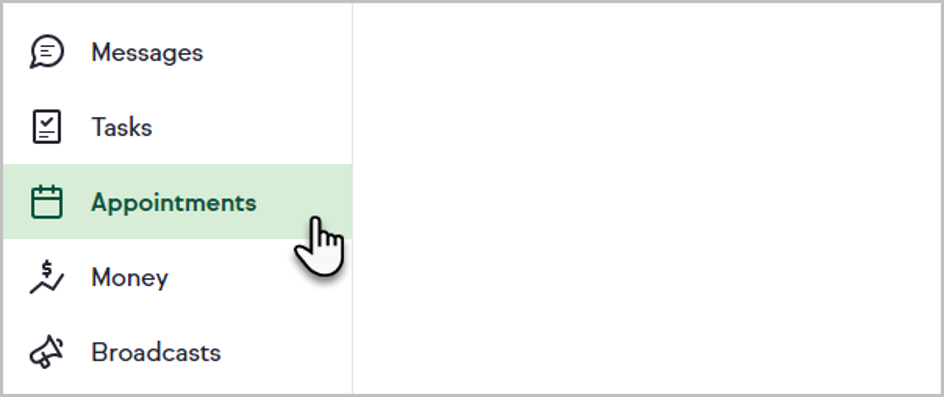
Go to “Appointments” in the navigation on the left side of the page
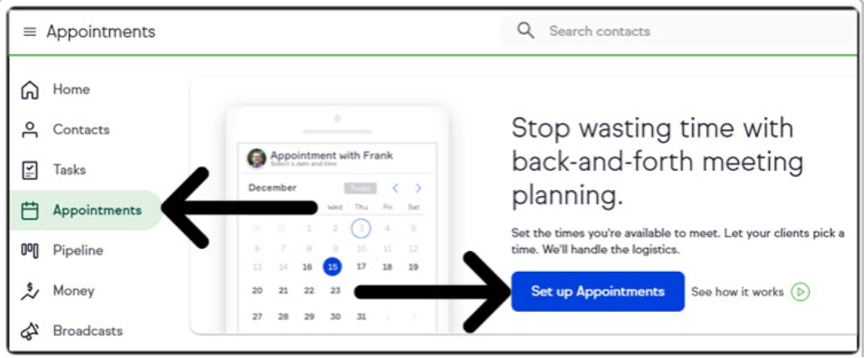
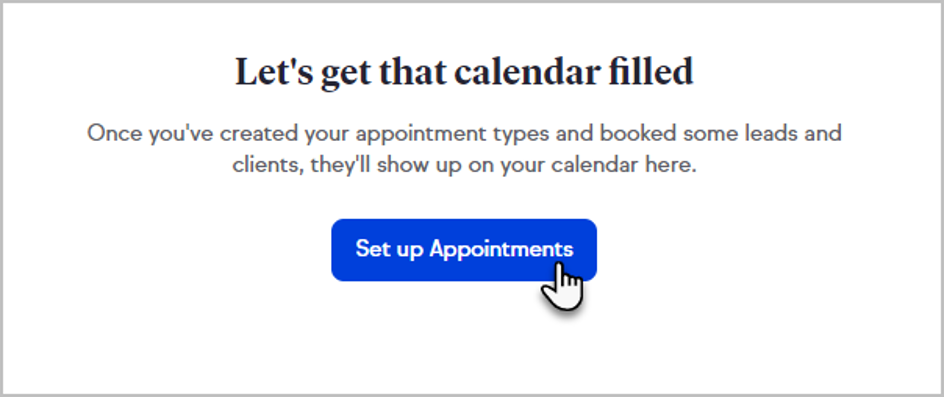
Click the “Set up your client booking page” button
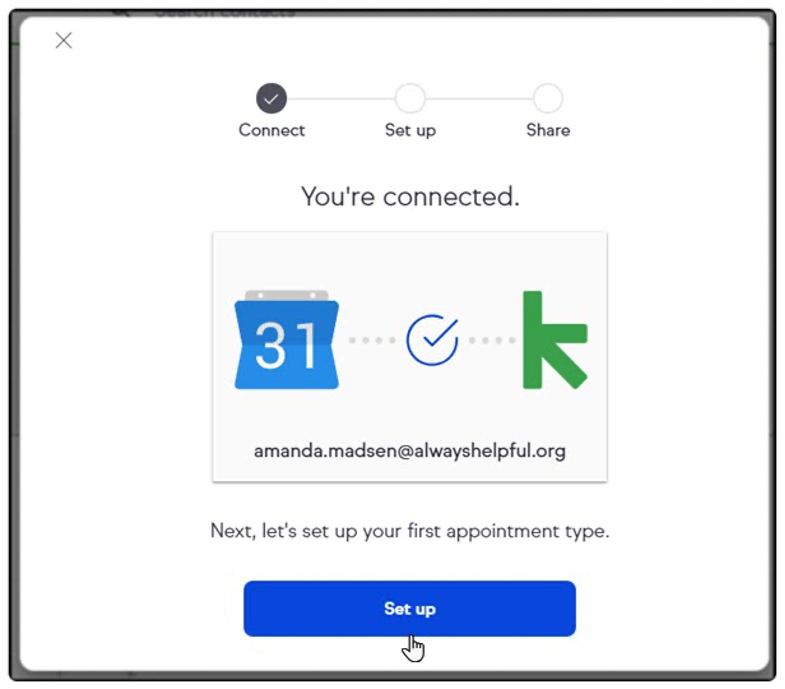
Click “Connect” to sync your current Google account with Keap.
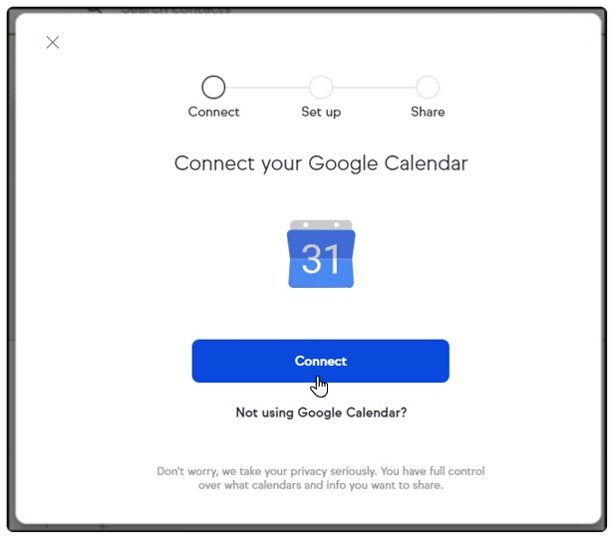
If you are not logged into your Google account, sign in with your Google username and password.
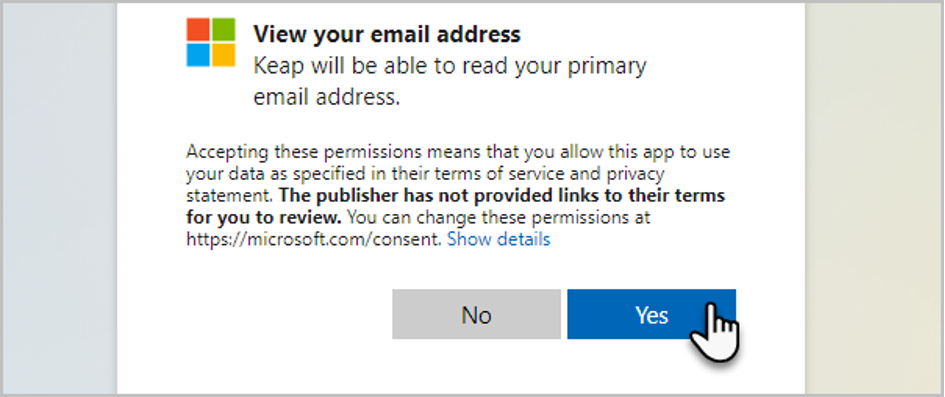
Click Allow to give Keap permission to manage your Google Calendar.
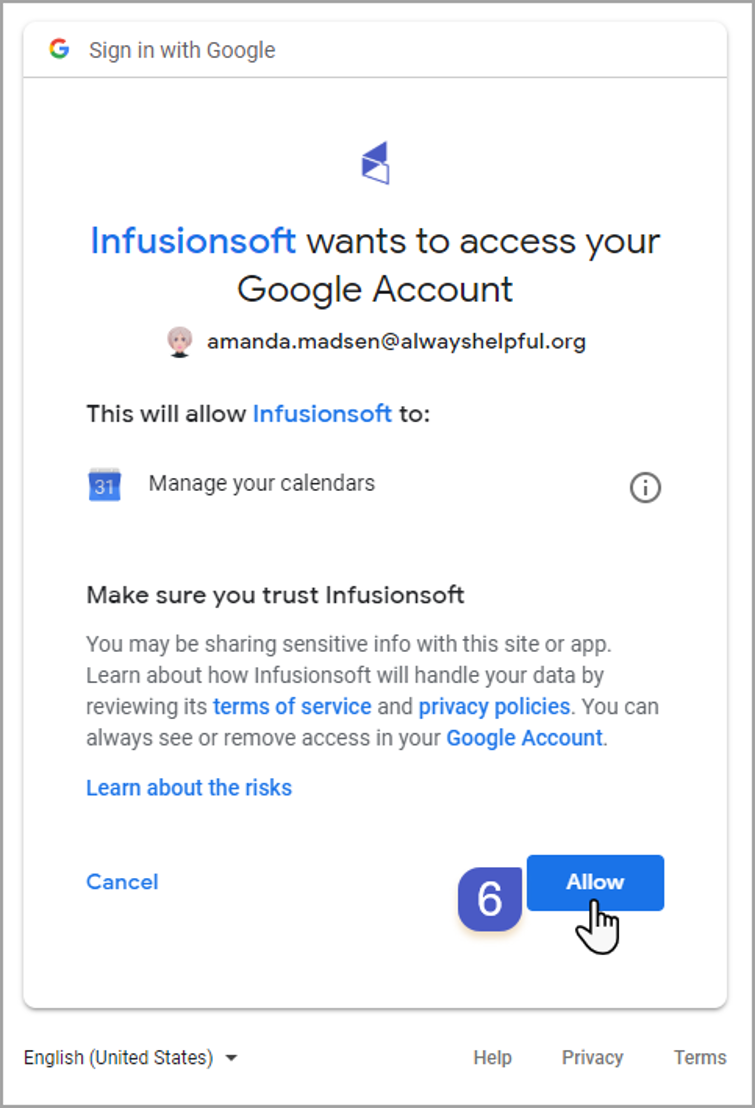
Clicking Allow gives access to Keap to see Google Calendar events and display them within Keap’s calendar.
It also allows Keap to determine where you have openings within your Google Calendar to create new appointments.
How to connect Keap Appointment Scheduler with Outlook Calendar
Navigate to Appointments
Click on Set up Appointments
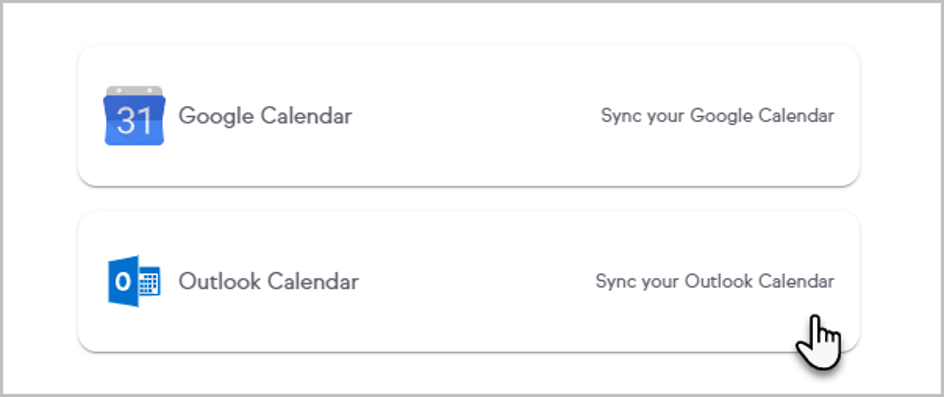
Choose Outlook Calendar
Log in to Outlook with your email address and password.
Click Yes to grant Keap access to your calendar.
You can now use your Outlook calendar for Keap Appointments.
How to set up your Appointment Booking Page in Keap
Once your Google Calendar or Outlook Calendar has been connected to Keap, you can set up your booking page.
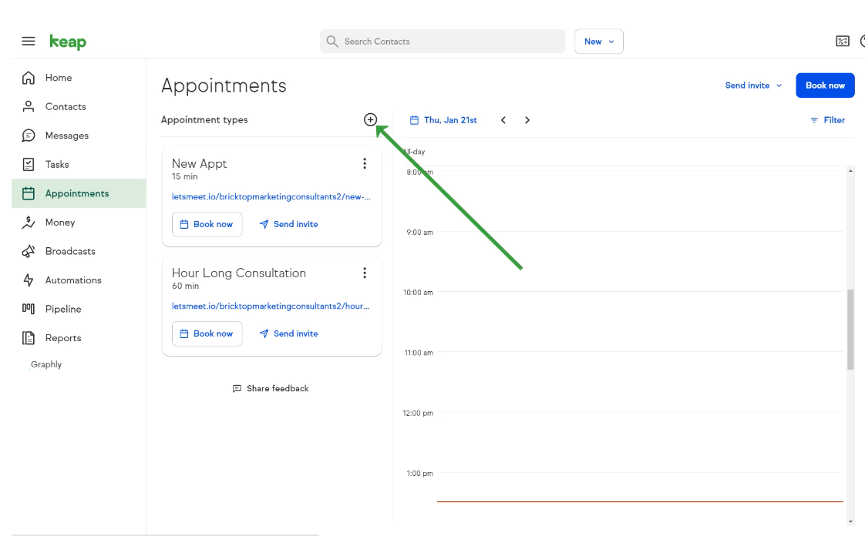
Click on Appointments in the dashboard and click the + icon to add a new Appointment type.
Name your appointment. Note that the name becomes the end of the booking URL.
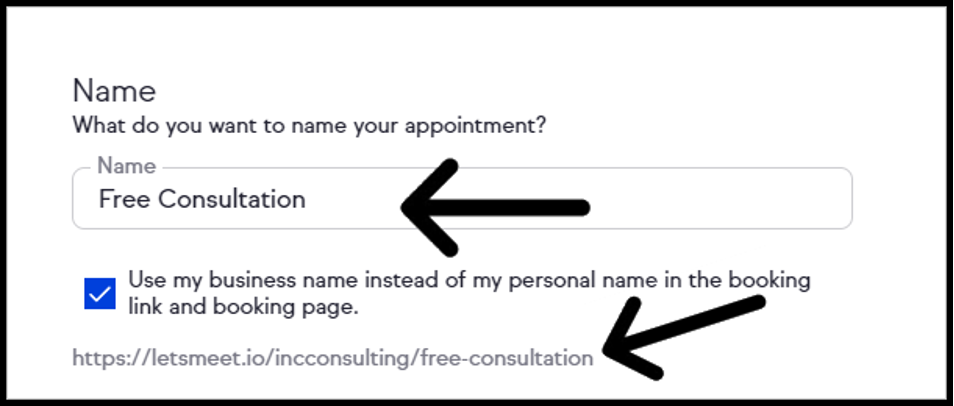
Check the box to use your company name instead of your personal name in the booking link.
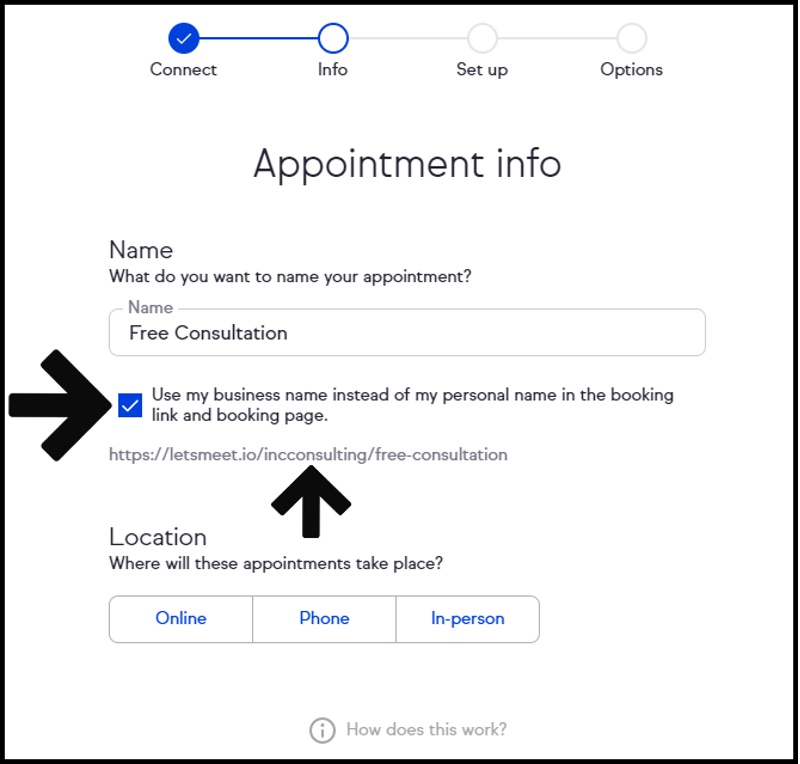
On the Location tab, select one of the available options:
Online – You can choose to provide an online meeting link or have the invitee provide a meeting link.
Online – You can choose to provide an online meeting link or let the invitee provide a meeting link.
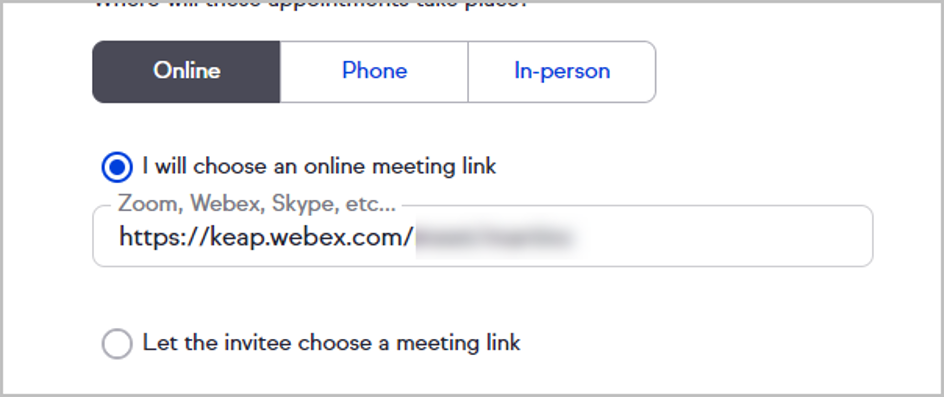
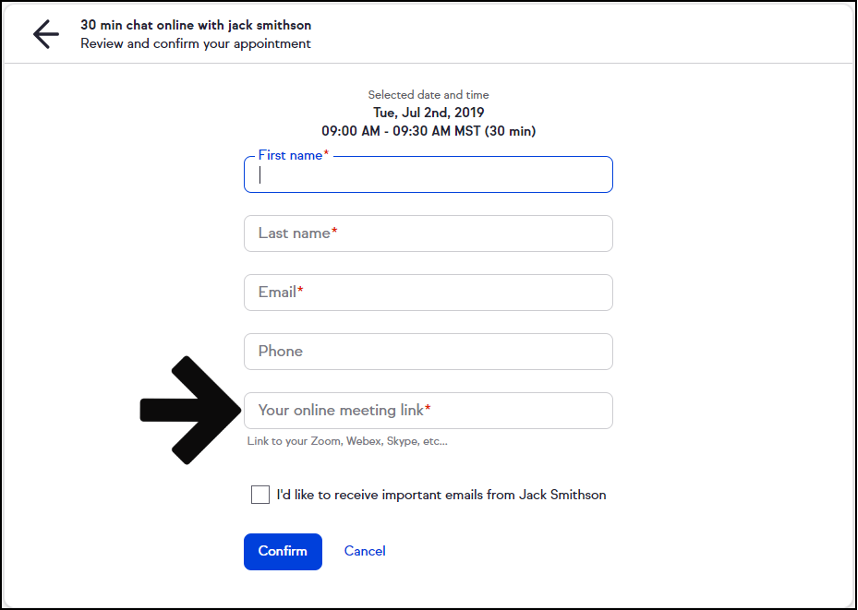
If “Let the invitee choose a meeting link” is selected, the invitee must fill in the Your online meeting link field in the appointment invitation they receive by email.
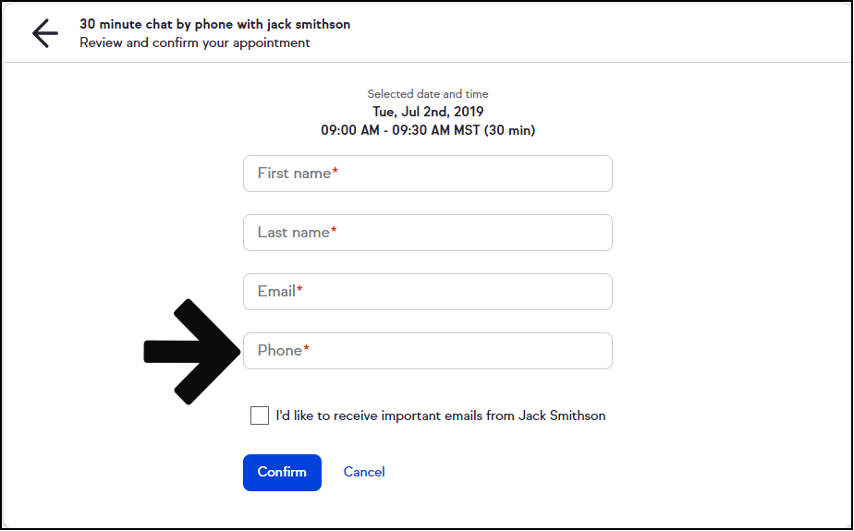
Phone – You can choose to call the customer (by asking the invitee for their phone number) or have the invitee call the user (by providing a phone number for the invitee to call).
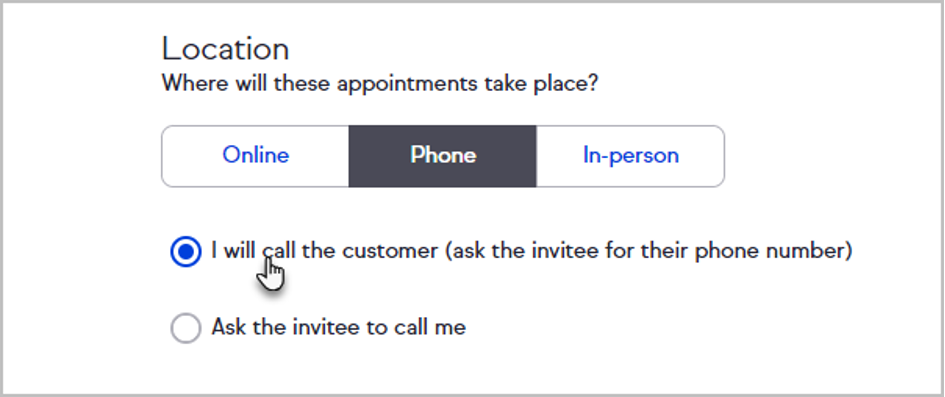
If “I will call the customer” is selected, the invitee will need to fill out the phone field in the appointment invitation they receive via email.
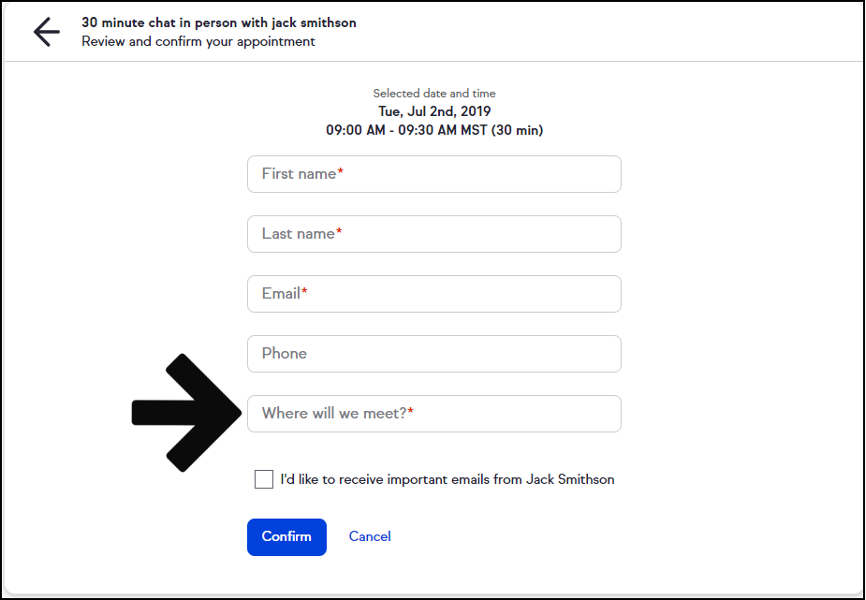
In Person – The user can choose the location of the meeting and provide an address or let the invitee choose the location.
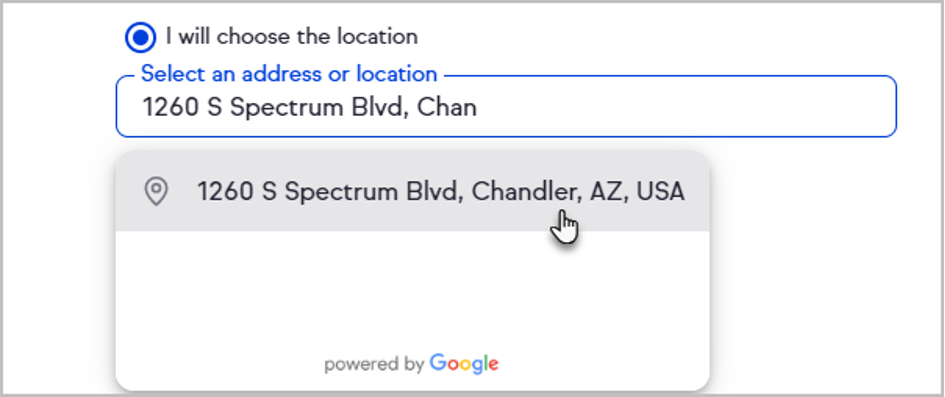
If the “Let the invitee choose the location” option is selected, the invitee must complete the Where will we meet field in the appointment invitation they receive via email.
Click Next
You can choose from the standard time frames available (15, 30, 45, 90 minutes, 1 hour or 2 hours increments )
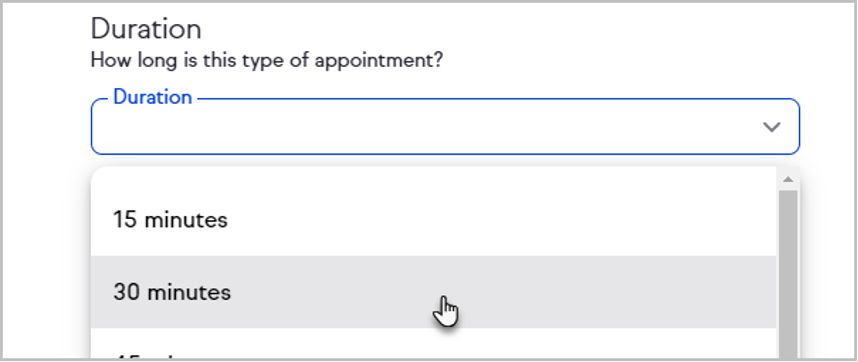
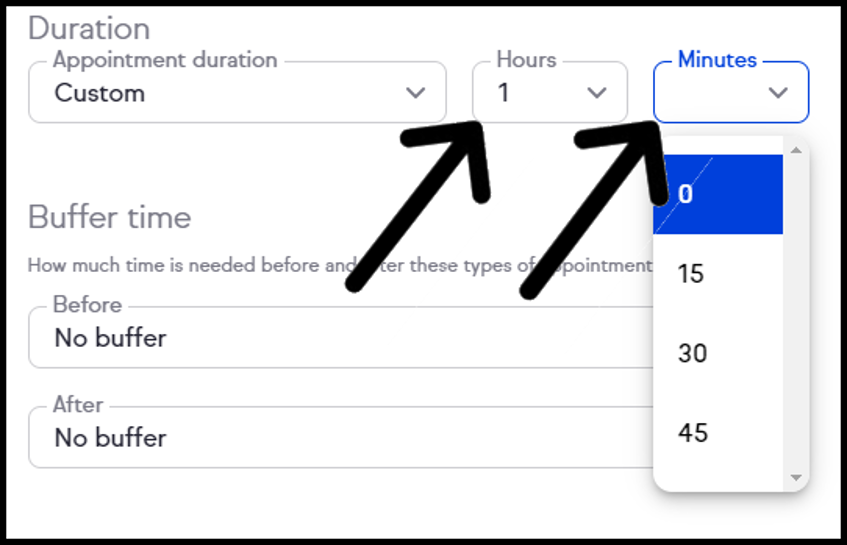
Scroll to the bottom of the Appointment Duration drop-down menu to select a custom duration if you want.

If “Custom Duration” is selected, select the duration using the Hour and Minute drop-down boxes.
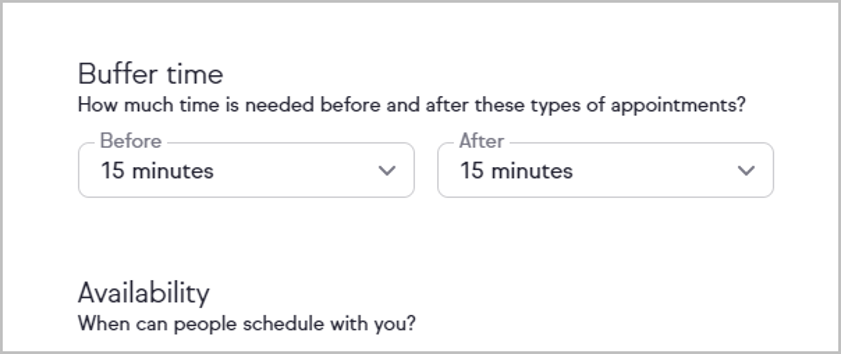
You have the option to add a buffer time of 15, 30, or 45 minutes between appointments.
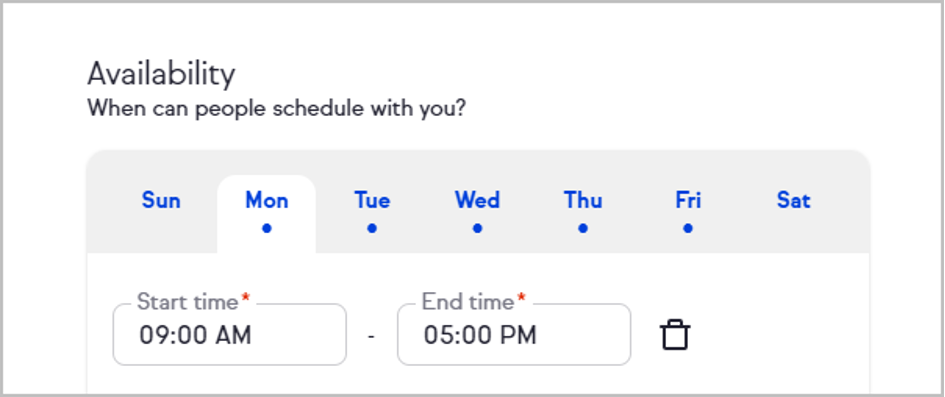
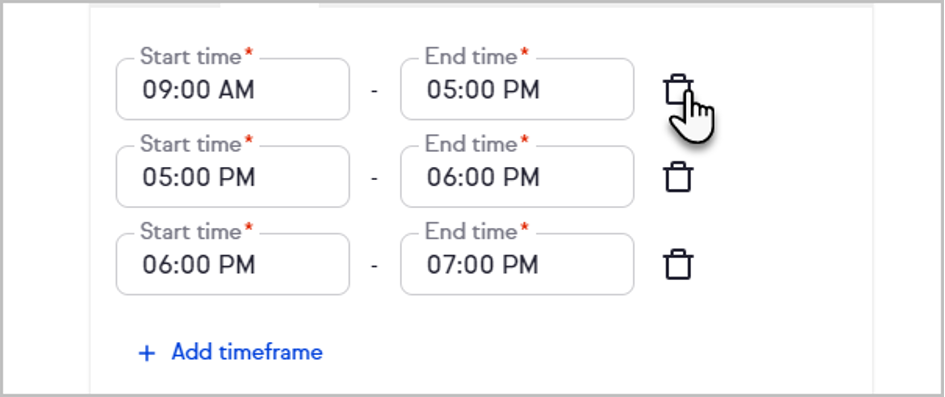
Select time slots over any day of the week that you want to be available.
Click + Add timeframe to add more time frames for that day.
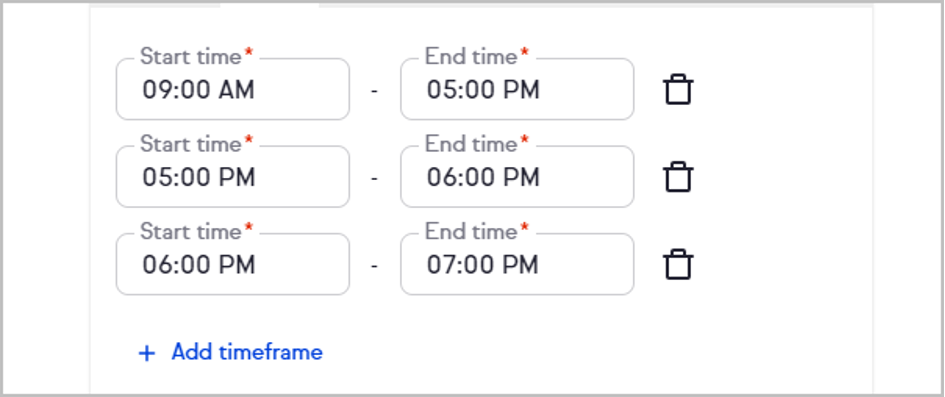
Click on the trash bin button to remove a time frame
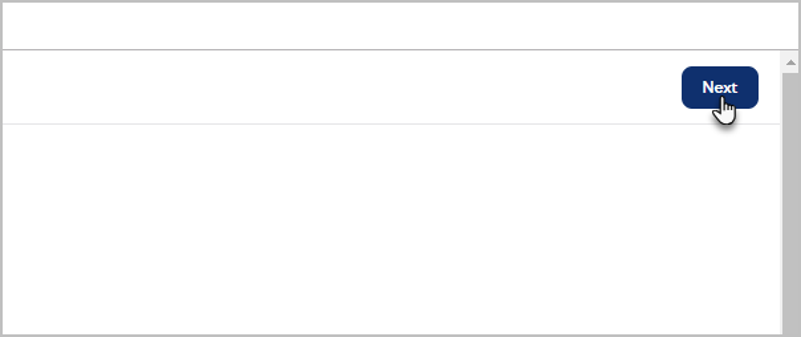
When you have set the days and times you want, click “Next” in the upper right corner
Activate the toggle to add Pre-appointment instructions

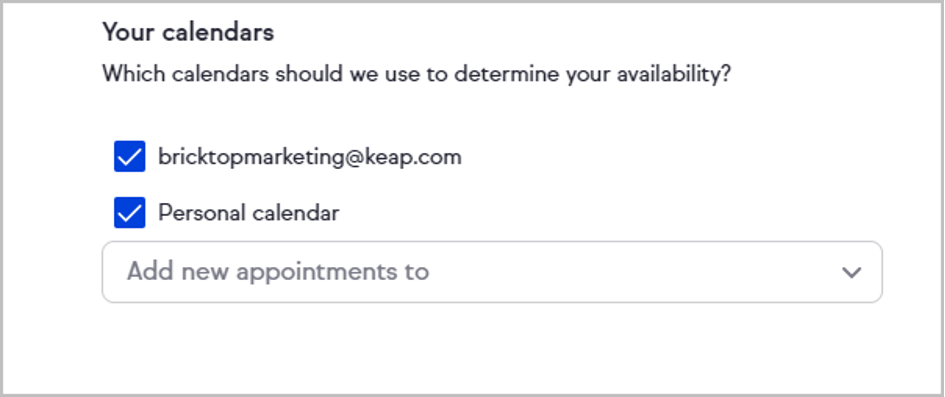
If you select multiple calendars, you will be prompted to select a calendar to add new appointments to be added to by Keap.
Click Finish in the upper right corner.
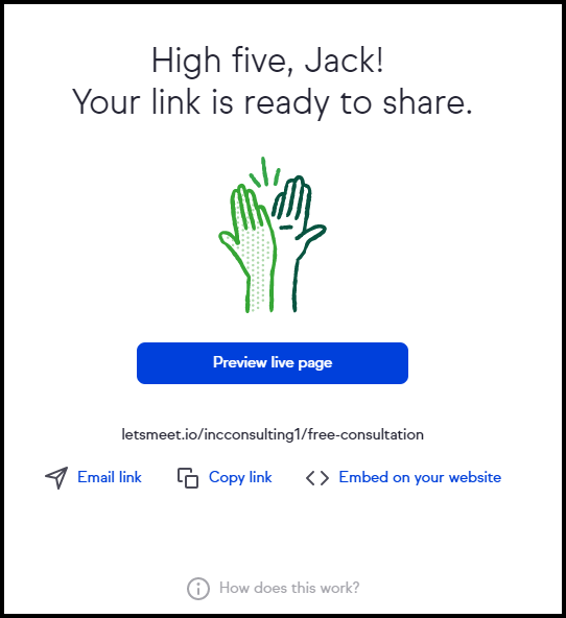
Copy the link and click Done in the upper right corner.
How to send the links of your Appointment page to Chatagents.com
Please share your appointment page link by logging into the integration page of your Chat Agents account.
To do this, go to https://my.chatagents.com/ in your Chat Agents dashboard and go to “Integrations” which should open https://my.chatagents.com/integrations.
Look for Keap Scheduler and check the “Activate” box.
Then click on the “Help Icon” next to activate and a form should open.
Paste in the link you copied from Keap’s appointment page. Also include any messages or special instructions you would like to send to our chat agents into this form.
Once you do this, our support team will set it up, usually within 24 hours. Once set up, our chat agents can now start scheduling appointments, either by sharing the link with chat visitors so they can book an appointment with you, or by asking for the details and scheduling your appointment for them.
If you have any questions or need help integrating Keap or other apps with your Chat Agents account, please contact us via the Help section on your Chat Agents dashboard – we will be happy to do it for you, at no additional cost.