HubSpot – what is it?
HubSpot CRM helps businesses of all sizes track and nurture leads and analyze business metrics. HubSpot is suitable for any B2B or B2C business in a variety of segments, including accounting, marketing, sales, construction, retail, real estate, and more.
It offers features like outbound and inbound marketing, sales automation, sales pipeline management, customer relationship management, email tracking, lead management, contact management, and more.
HubSpot CRM provides a visual dashboard with a real-time view of the entire sales funnel. With the CRM system, businesses can automatically track customer interactions via email, social media, live chat, or phone calls, and each interaction is stored in a timeline organized by leads.
HubSpot CRM sales tools help sales reps manage contacts, track deals, manage their sales pipeline, and more.
NOTE : Chat Agents also integrates natively with HubSpot CRM for chat leads, so you can automatically send information between Chat Agents and HubSpot CRM – no code required.
NOTE : Chat Agents also integrates HubSpot Intake Forms. Let our chat agents handle your client intakes with your website chat visitors, using HubSpot Intake.
Here is how to get started with HubSpot Meeting Scheduler & Chatagents.com.
To schedule appointments on your behalf in HubSpot Meeting Scheduler, our agents need access to your public HubSpot Scheduler page. All we need is the direct link of your meeting page.
The following steps will show you how to set up your meeting scheduler and retrieve and share your direct scheduling link with us.
If you do not already have a HubSpot CRM account, sign up for a free trial at https://app.hubspot.com/signup-hubspot/sales,
or log in at https://app.hubspot.com/login if you already have a HubSpot account.
Once you have completed the signup and logged in, you’ll be guided through a series of steps and walkthroughs to complete the HubSpot Meeting Scheduler setup.
How to set up Meeting Scheduler in HubSpot
HubSpot’s meeting scheduler makes the task of scheduling online appointments with your clients easier. The following steps show you how to set up your meeting pages in just a few clicks.
Click on the Sales >Meetings >Get Started in your dashboard.
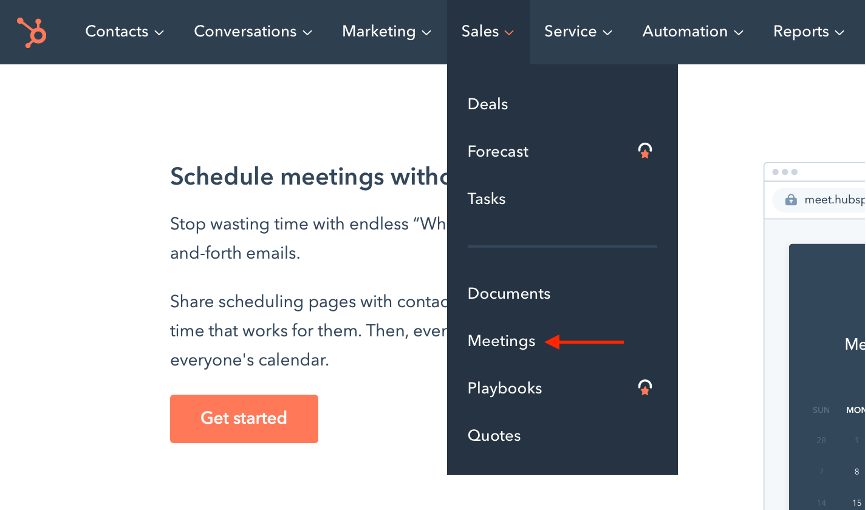
It will automatically create your first personal meeting. You can further customize it by hovering over the row and clicking the “Edit” button.
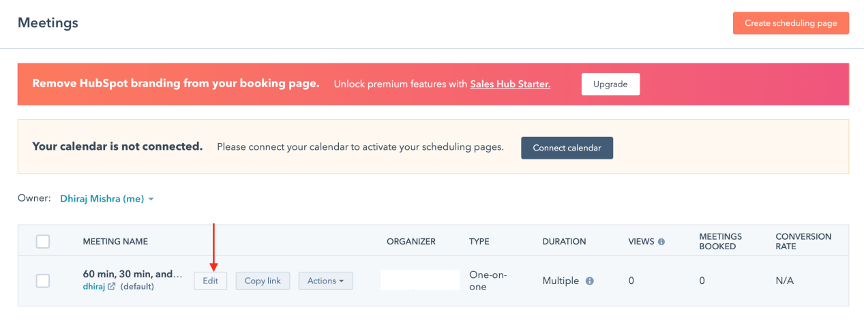
Under the “Overview” tab, you can customize the meeting title, duration, location, and description of the meeting.
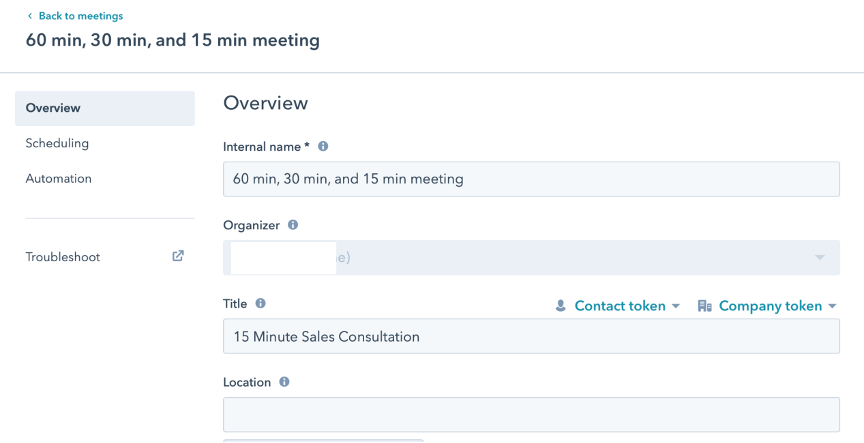
You can also connect a video conferencing app like Zoom or UberConference
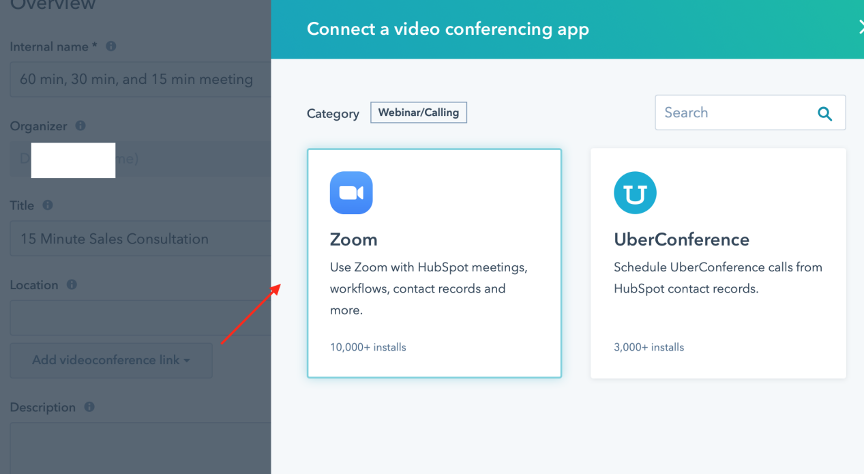
Under the Scheduling tab, you can set the meeting duration, time zone, availability, and hours
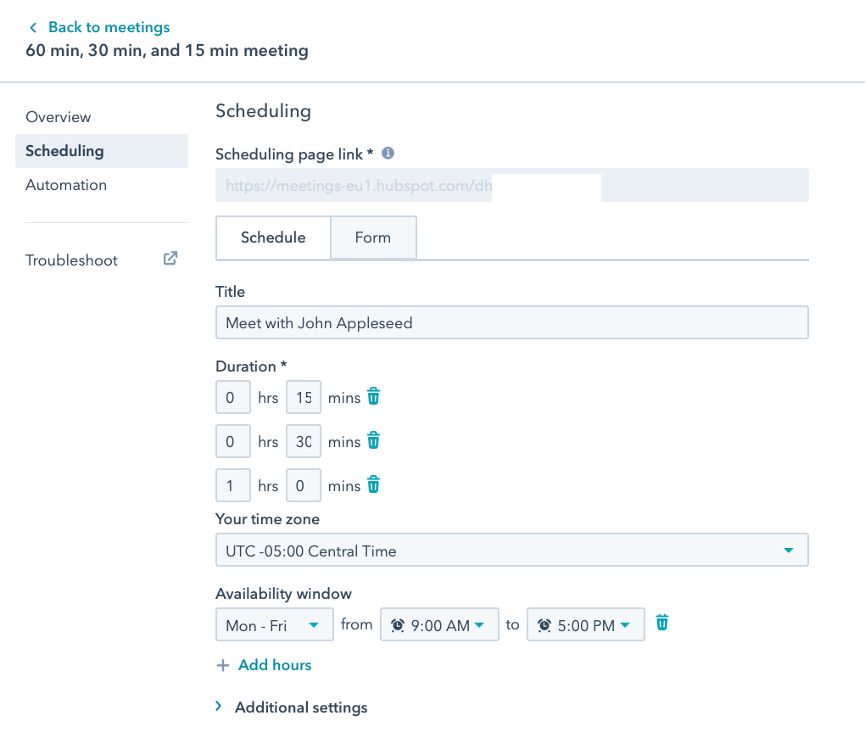
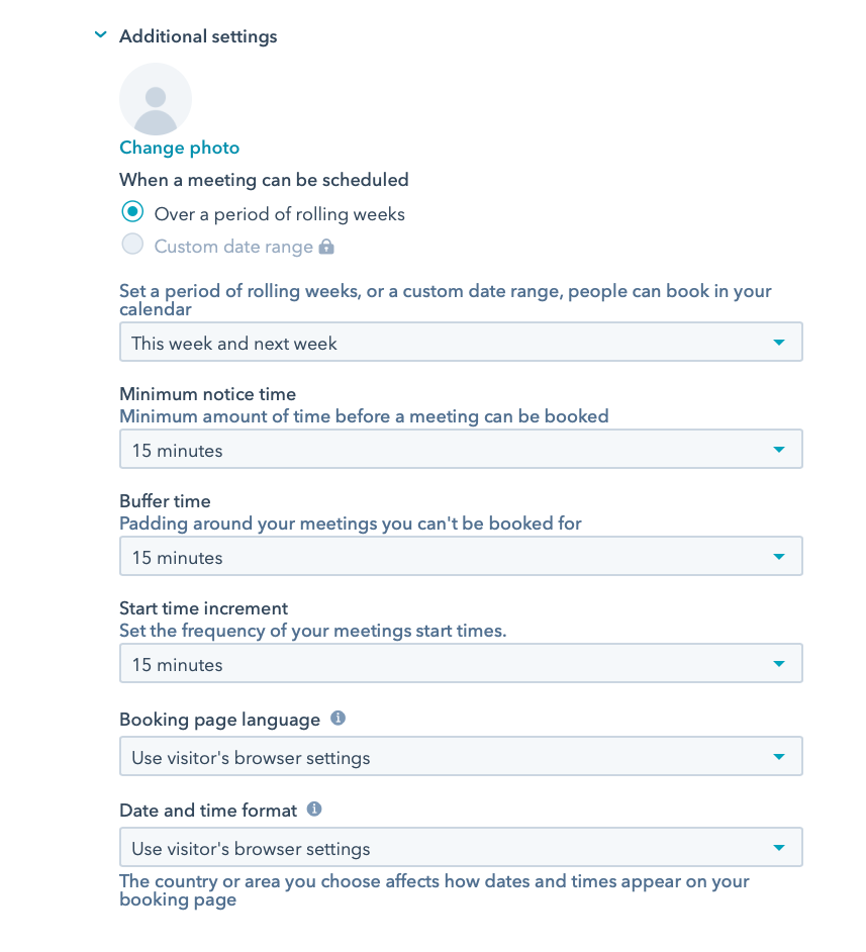
Set up additional parameters such as buffer time before and after the appointment, time difference between 2 appointments and others.
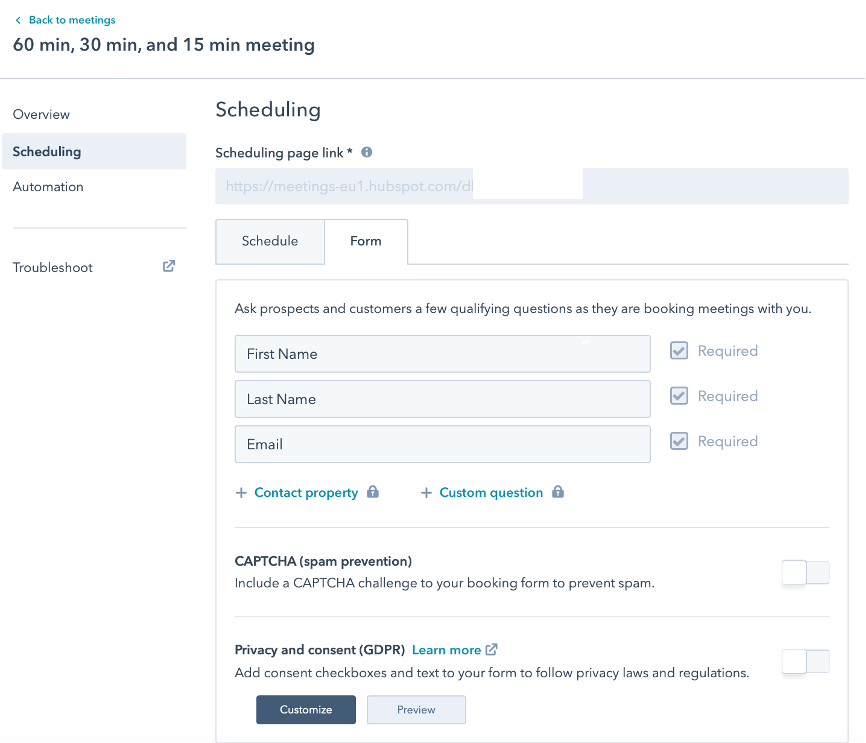
Switch to the Form tab (under Scheduling) to create the request form for Invitee Questions. Click Save when you are finished.
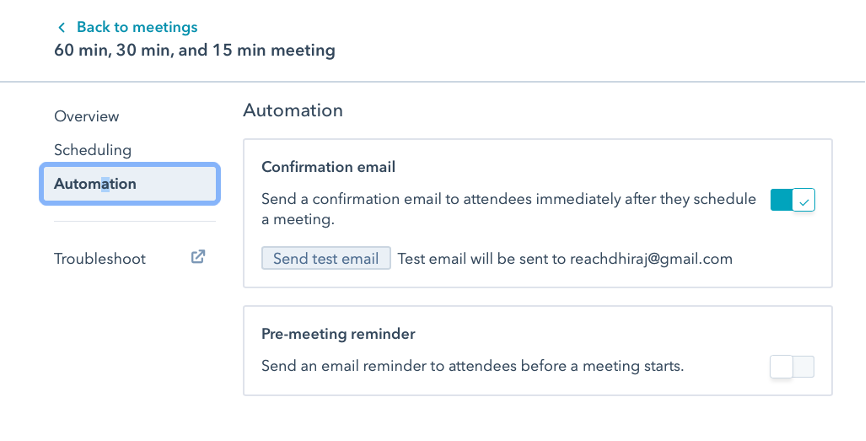
Under the Automation tab, you can set up email reminders and pre-meeting reminders
Click SAVE when you are finished.
You should now see your newly created meeting page with its page link.

Copy the link.
How to connect your HubSpot Scheduler with third-party calendars
HubSpot Scheduler can connect with your other third-party calendars like GMail and Office 365 for real-time syncing.
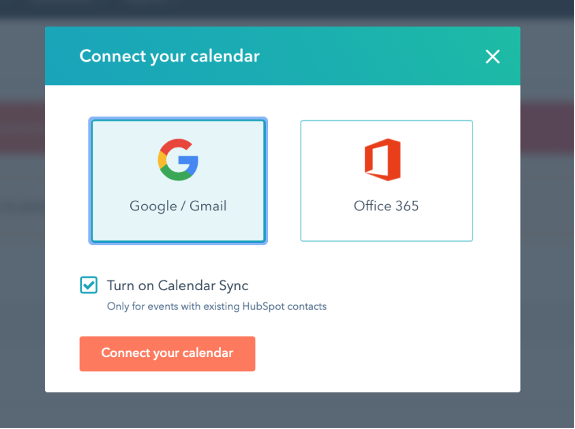
To do this, go to the Dashboard >Sales >Meetings and click “Connect Calendar“.
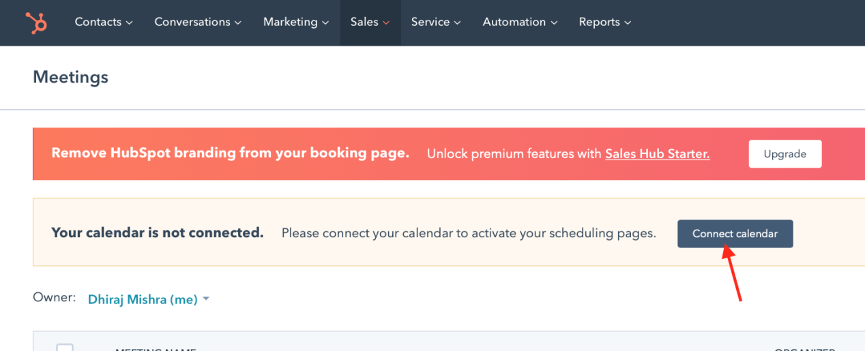
Select one of the available options and accept the terms.
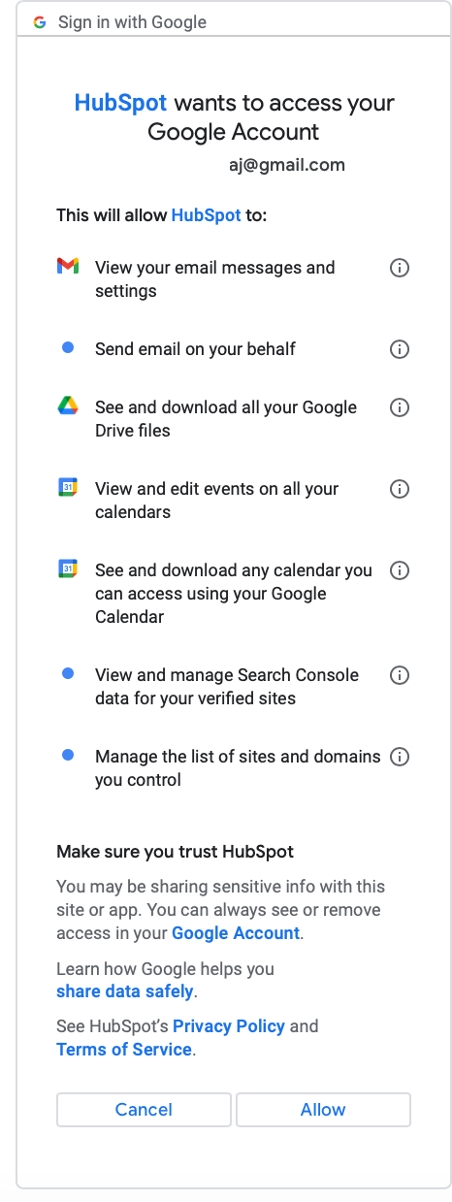
Grant HubSpot access to manage contacts and calendars
Save the changes. That’s it.
Your third-party calendar and contacts are now synced with HubSpot Scheduler.
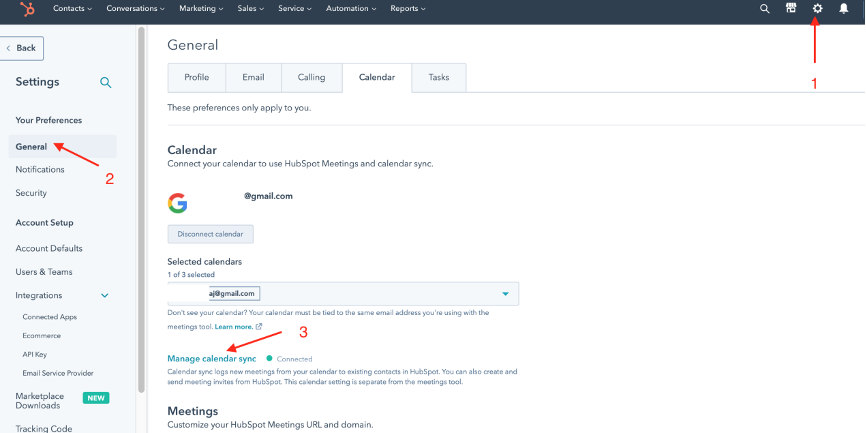
You can always visit Sync Settings under Settings General > Calendar to change the settings in the future.
How to send the links of your Meeting page to Chatagents.com
Please share your meeting page link by logging into the integration page of your Chat Agents account.
To do this, go to https://my.chatagents.com/ in your Chat Agents dashboard and go to “Integrations,” which should open https://my.chatagents.com/integrations.
Look for HubSpot Scheduler and check the “Activate” box.
Then click on the “Help Icon” next to activate and a form should open.
Paste the link you copied from HubSpot meeting page.
Also include any messages or special instructions you want to send to our chat agents into this form.
Once you have done this, our support team will set it up, usually within 24 hours. Once set up, our chat agents can now start scheduling appointments, either by sharing the link with chat visitors so they can book an appointment with you, or by asking for the details and scheduling your appointment for them.
If you have any questions or need help integrating HubSpot Scheduler or other apps with your Chat Agents account, please contact us through the help section on your Chat Agents dashboard – we will be happy to do it for you, at no additional cost.
