
Clio Scheduler – what is it?
Clio Scheduler is an appointment scheduling tool that allows potential clients to schedule an initial consultation without the need for correspondence.
With Clio Scheduler, businesses can embed a secure booking link on their website or email a unique link to a potential client. After clicking the link, potential clients can select a time slot that matches the lawyer’s availability, enter their details and complete the booking. The potential clients receive confirmation and reminder emails to reduce the no-show rate.
Why use Clio Scheduler?
# Better client experience via the cloud. Eliminate barriers for potential clients seeking legal services. Provide a modern, straightforward booking experience with flexible payment options while working remotely.
# Encourage positive reviews and referrals. Provide a modern, straightforward booking experience. Allow potential clients to book available time slots that work for you – and for them.
# Save yourself the back-and-forth of emails. Clio Scheduler replaces the emails required to coordinate times that work for both parties, reschedule appointments and process cancellations.
# Accept online payments and confirm appointment bookings remotely. Make it easy for clients to pay for consultations using their preferred payment method by accepting online credit card payments- and reduce the risk of no-shows.
# Reduce the risk of no-shows and guarantee payment from potential clients. Collect funds for appointments in advance by accepting online credit card payments. Automatically record new contacts, associated payments and your firm’s consulting revenue with Clio Scheduler + Clio Payments.
# Increase productivity and support a distributed law firm. Automate your contact workflow and ensure created appointments are automatically added to your Clio Manage calendar and any Google or Outlook calendar synced with Clio Manage, making remote collaboration a breeze.
NOTE : Chat Agents also integrates natively with Clio Manage for chat leads, so you can automatically send information between Chat Agents and Clio Manage – no code required.
 Chat Agents
NOTE : Chat Agents also integrates natively with Clio Grow for chat leads, so you can automatically send information between Chat Agents and Clio Grow – no code required.
Chat Agents
How to get started with Clio Scheduler & Chatagents.com.
If you use Clio Calendar to schedule online appointments with your clients, Chat Agents can handle the scheduling for you using Clio Calendar).
If you do not already have a Clio account, sign up at https://www.clio.com/ or log in at https://app.Clio.com/ if you are already a Clio user.
How do you set up Clio Scheduler?
To use Clio Scheduler, you will need Clio Grow and Clio Manager.
To set up Clio Scheduler, you must enable Clio Grow to send calendar events to the Clio Manage calendar.
The following steps describe how to do this:
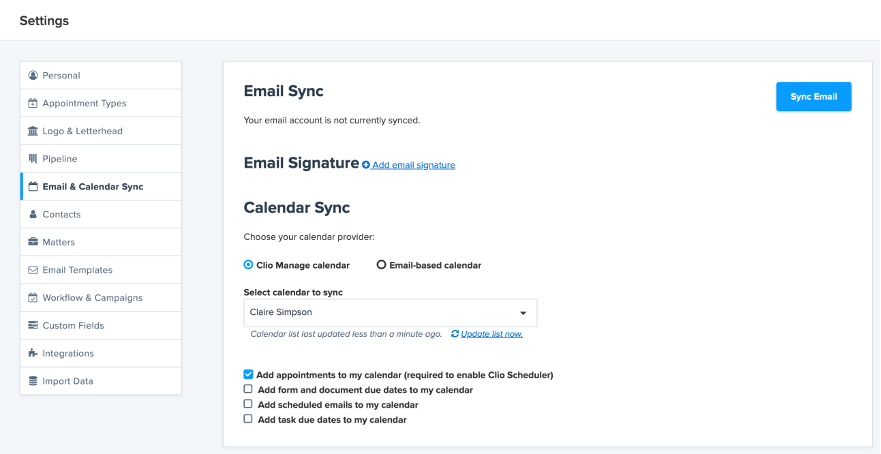
Go to the Settings >Email & Calendar Sync page.
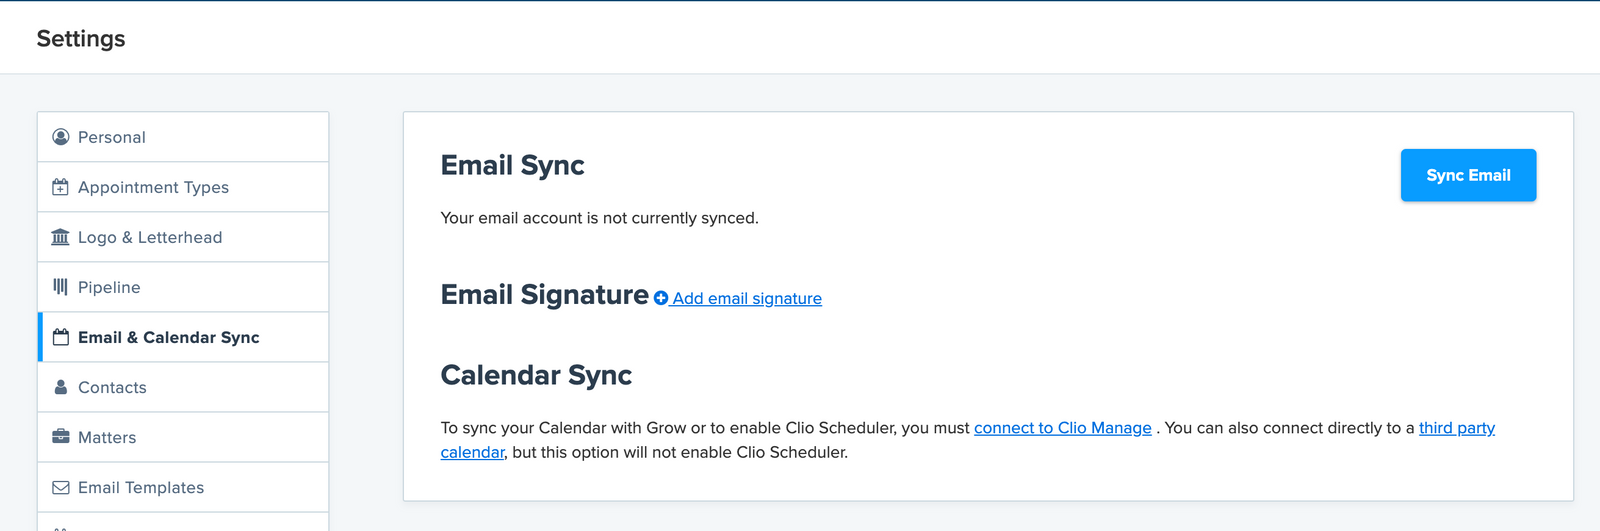
- Click on the “Connect to Clio Manage” link and log in using your Clio Manage account credentials.
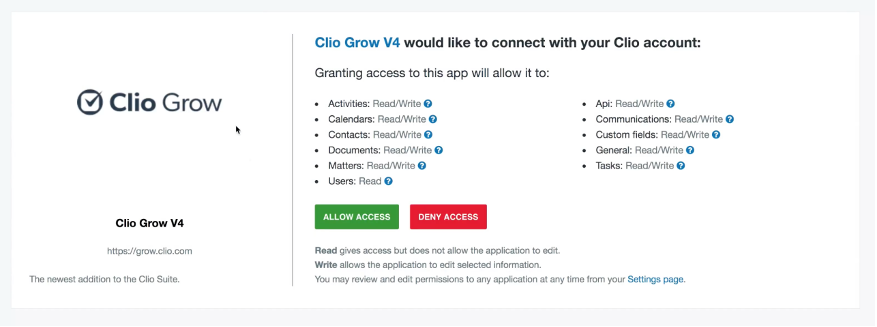
- Click “Allow Access” button on the authorization page that appears.
Grow will automatically link to the Clio Manage calendar that matches the username in Grow (if available). If no matching calendar is found, you will need to manually select a calendar to sync with.
Note: You may need to click Refresh list now to find your calendar name.
Ensure the Add appointments to my calendar option is checked.
To set up a new appointment type, do the following:
On your Clio Grow Dashboard, under the Settings, go to. Appointment Types
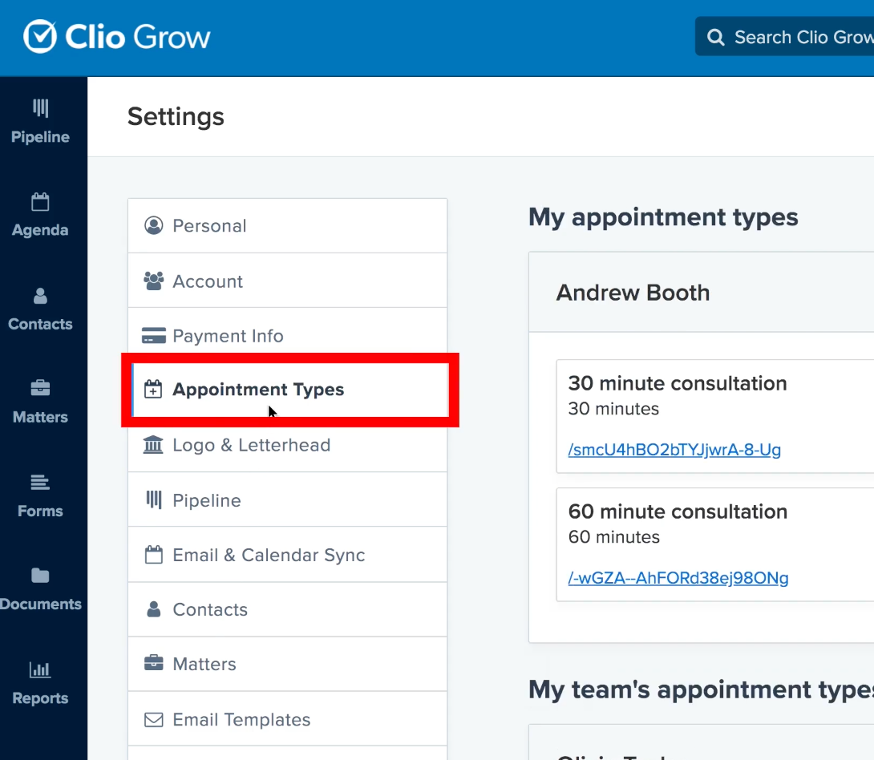
There you will see a list of your appointment types as well as your team’s appointment types.
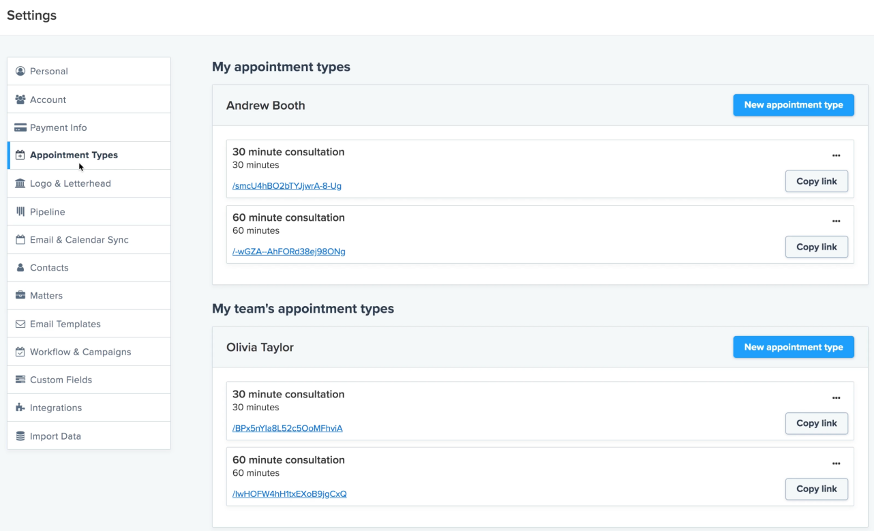
To create a new Appointment Type, click the New Appointment Type button.
Fill in the details, location, and description.
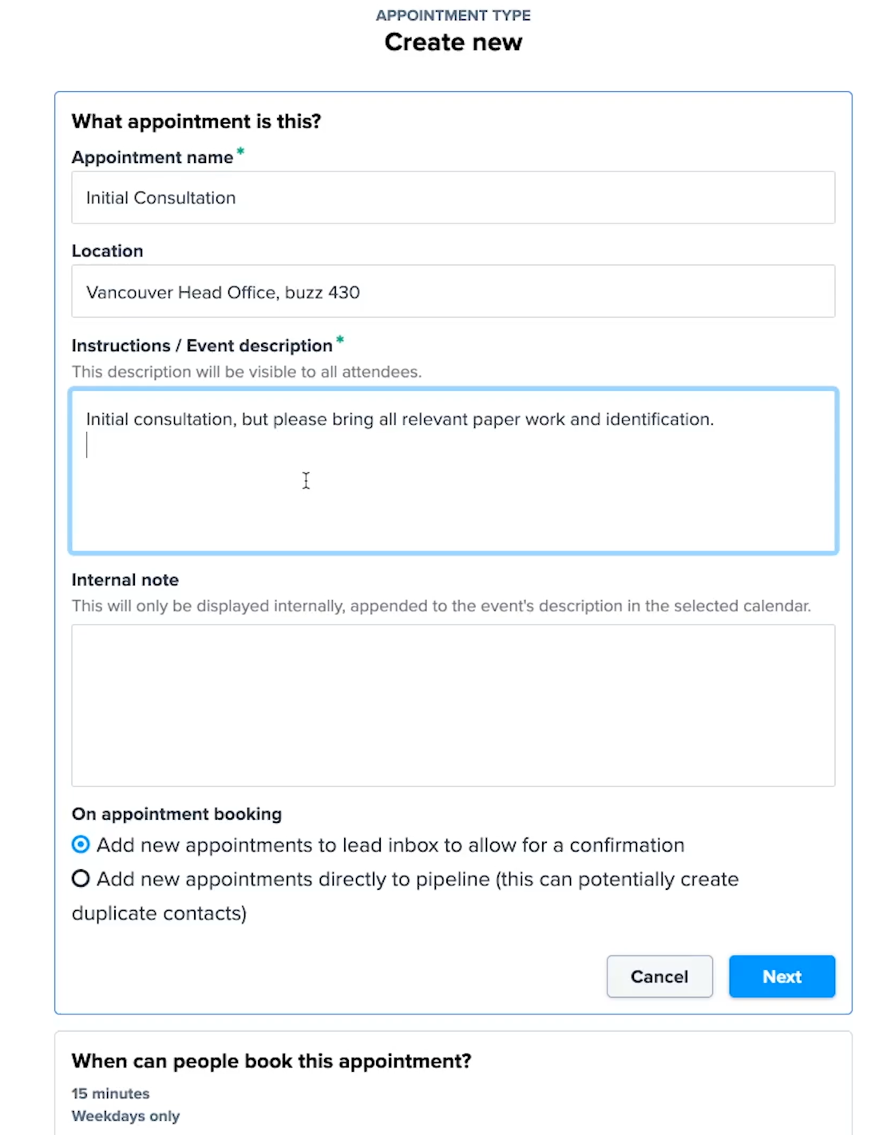
There are 2 options for how you want to add the appointment:
A – Add new appointments to your lead inbox so you can manually confirm them.
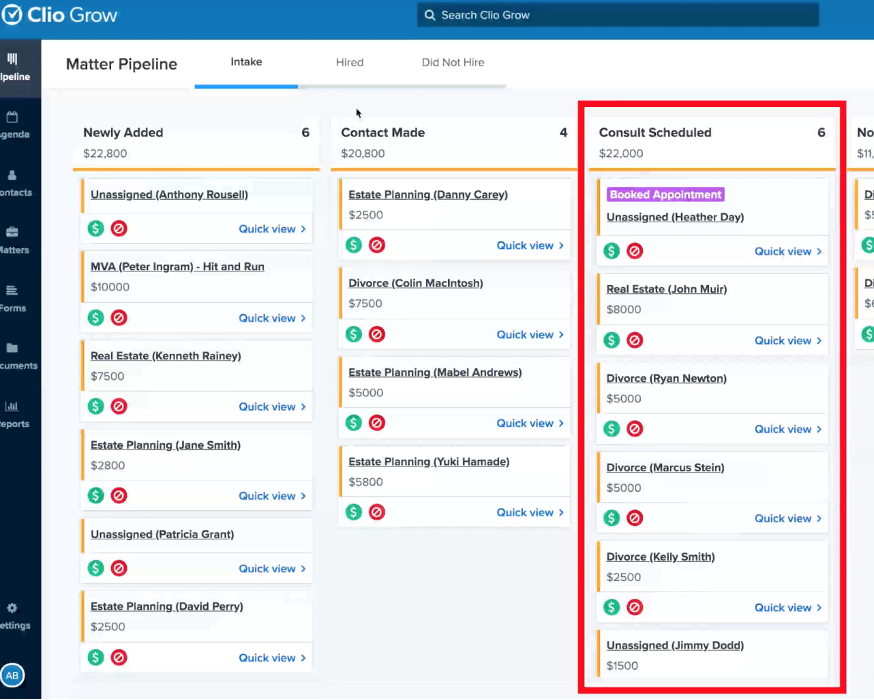
B – Add new appointments directly to the pipeline.
If you choose option B, the appointments will be added to the Consult Scheduled list, but there may be duplicate contacts.
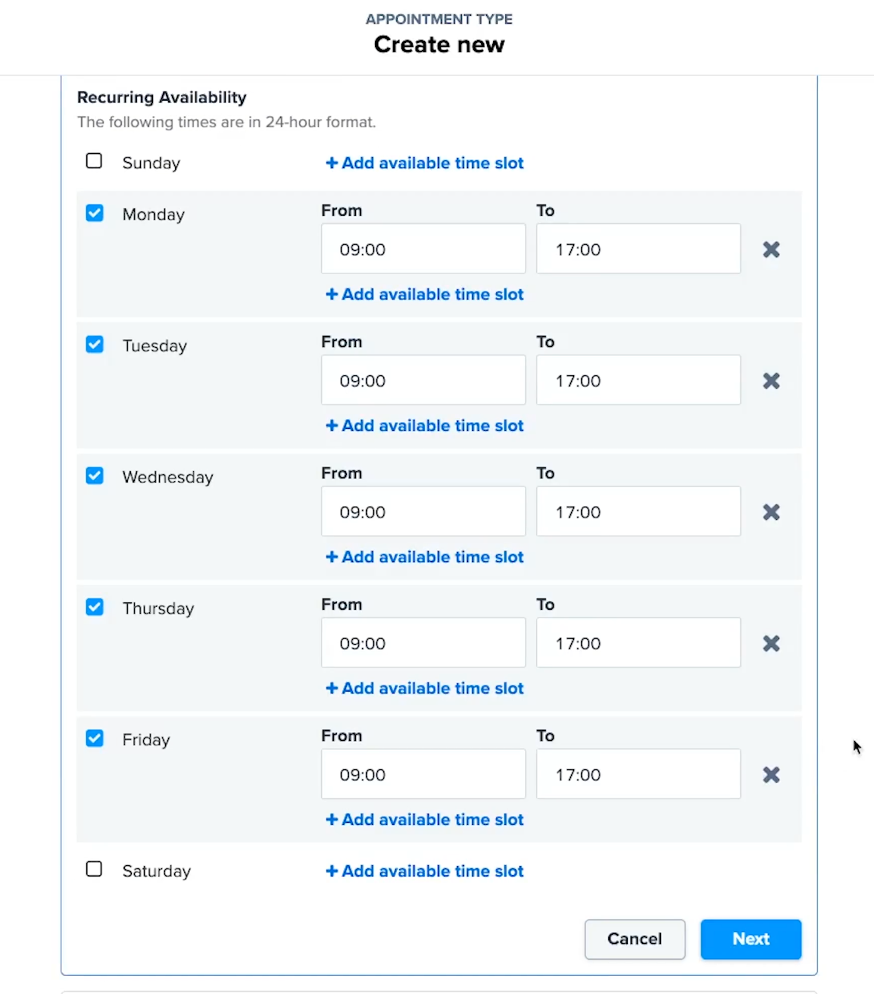
On the next page you can select your schedule
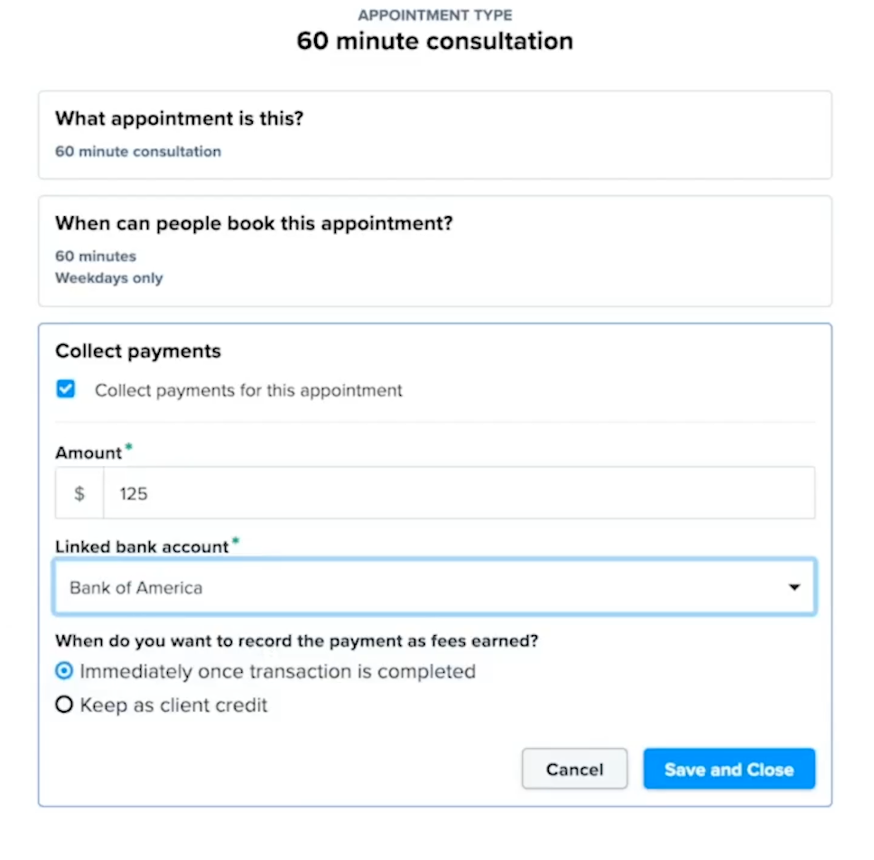
If you wish, you can also enable the payment collection option.
That’s it!
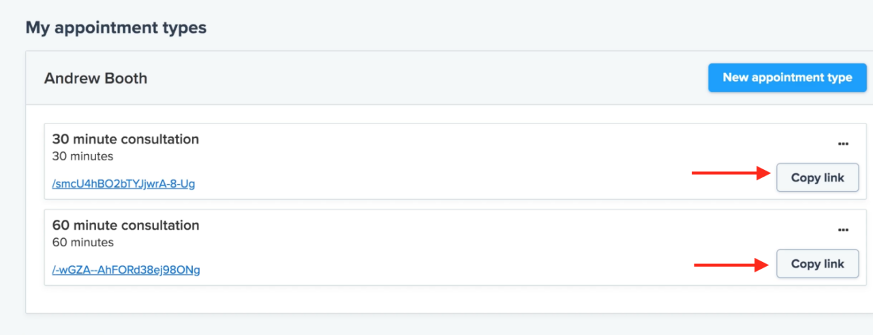
You should now see your newly created appointment type under the list of Appointment Types.
Click the hyperlink under the appointment name to open a public booking link, or click the Copy Link button.
What if I do not have Clio Grow? Can I still ask Chat Agents to book appointment for me in Clio?
If you do not have Clio Grow, you can use Clio Sync to connect to your other calendars such as Outlook or Google Calendar.
Using Clio Sync for Microsoft Outlook Desktop
Clio Sync for Outlook provides full bi-directional synchronization of Clio’s and Outlook’s calendars, contacts and tasks. This is available as a Windows application. This tool supports versions 2000-2013. It does not support 2016-2019.
The Outlook Desktop tool will sync “your calendar” in Clio with your primary Outlook calendar.
Setting Up Clio Sync for Outlook
Back up your Outllook Data using the steps provided here http://support.microsoft.com/kb/287070
Download Clio Sync from http://files.clio.com/ClioSync/ClioSync_Build_3124.exe and install it on your computer.
To open the Clio Sync settings menu, search for the application “Clio Sync Setup” in the available programs.
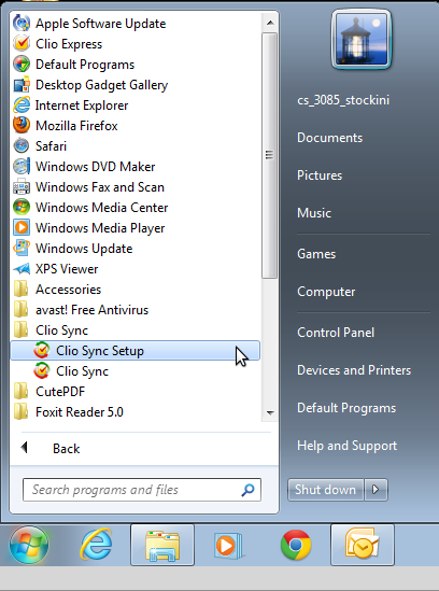
Once you open the application “Clio Sync Setup”, you will see the Clio Sync Setup screen.
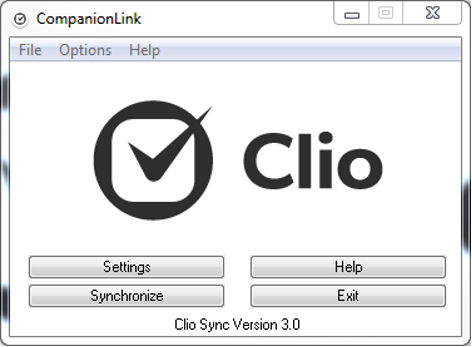
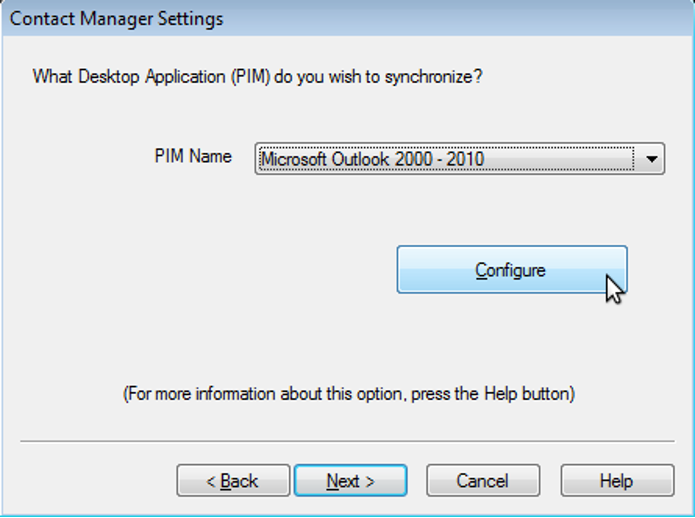
Click on “Settings” to start configuring Clio Sync. In the first step, you must enter your Clio credentials (these are the same credentials you use to log in to Clio).

Click “Next” and on the next screen click “Configure” to set sync configuration options.
Each tab is explained in detail below.
Transfer Method
The Transfer Method screen, allows you to configure the nature of the sync between Clio and Outlook.
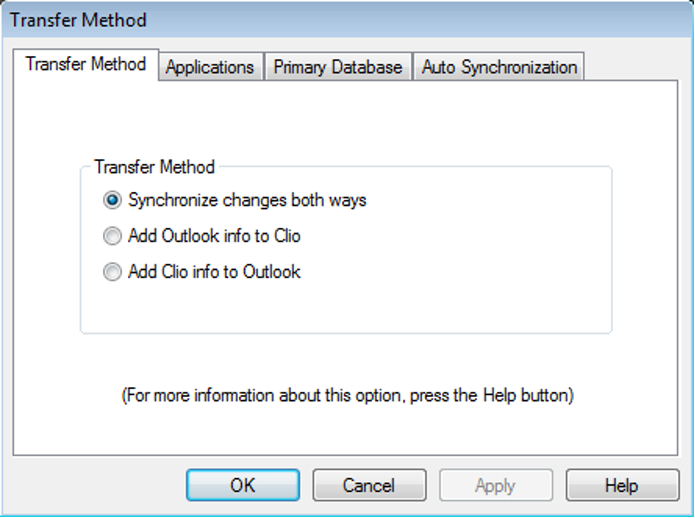
Synchronize changes both ways – This will sync changes both ways between Clio and Outlook – any additions, modifications, or deletions made in one will propagate to the other.
Add Outlook info to Clio – Information from Outlook will be transferred to Clio. No information from Clio will transfer to the Outlook.
Add Clio info to Outlook – Information is transferred from Clio to Outlook. No records are transferred from Outlook to Clio.
Applications
On this page you can select which types of data to synchronize with Clio. To disable synchronizing one type of data, uncheck the box.
If no option is checked, no data will be synchronized between Outlook and Clio.

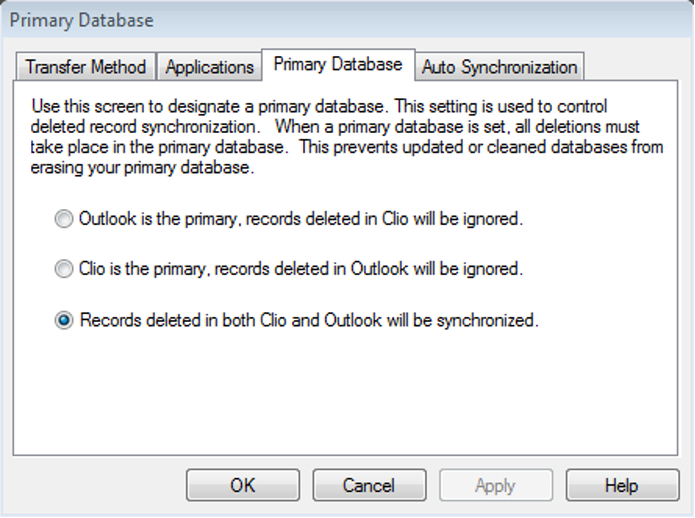
Primary Database
This page is used to control the propagation of deletions. The default behaviour is to have deletions propagate both ways, i.e. a record deleted in Clio will be deleted from Outlook and vice versa.
Auto Synchronization
This tab is used to control whether Clio Sync will automatically sync Outlook and Clio and, if so, how frequently it will sync.
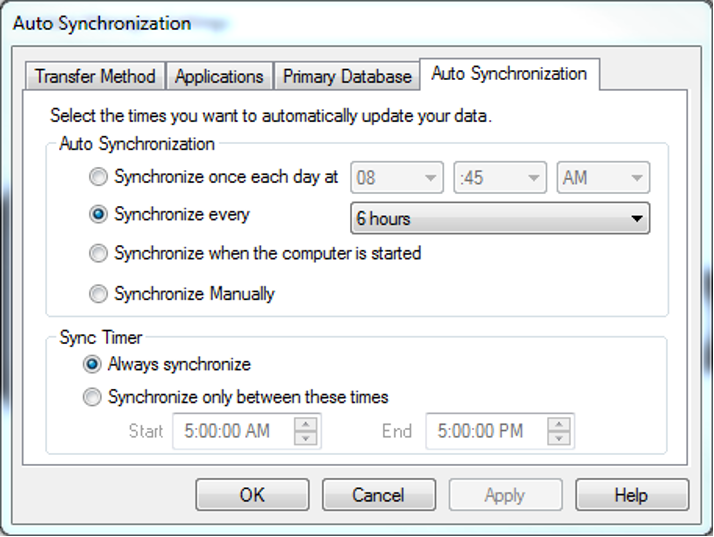
Synchronize once each day – Select the time at which you want to begin the sync. Use the drop-down menus to determine the hour, minute and AM/PM.
Synchronize every … hours – Select the interval time in hours in which you want to automatically sync.
Synchronize when the computer is started – This setting will synchronize your data when Windows is started. If you restart your computer, your data will be synchronized upon the restart, whether you have synchronized that day already or not.
Synchronize manually – Open Clio Sync Setup and select the Synchronize button on the Main Screen to sync.
Syncing your Google and Clio Calendars with Clio Sync for Google
Syncing Clio Calendars
Each Clio user can sync their Clio Calendar with their Google (Gmail or Google Apps) account by following our simple steps! Users can also sync other Calendars that sync to Google.
This is a bi-directional sync, meaning if you make changes in one end it will be reflected in the other (ie: creating new appointments or deleting appointments).
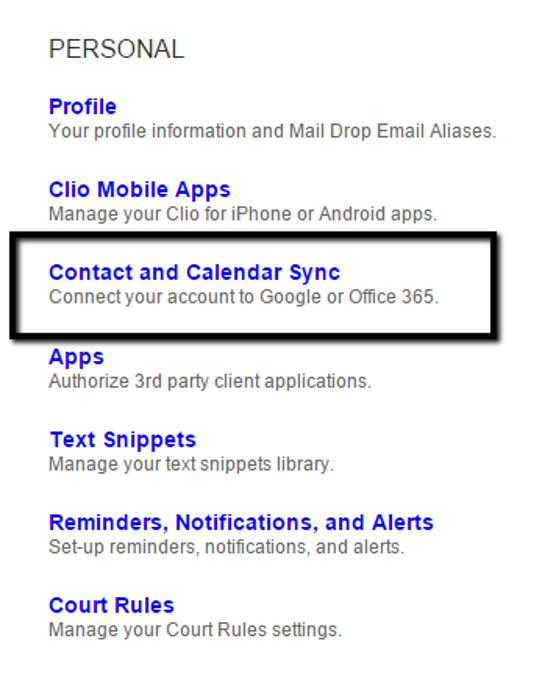
Click on the gear icon in the Clio header to open the Settings panel.
Next, click on “Contact and Calendar Sync” in the Personal column.
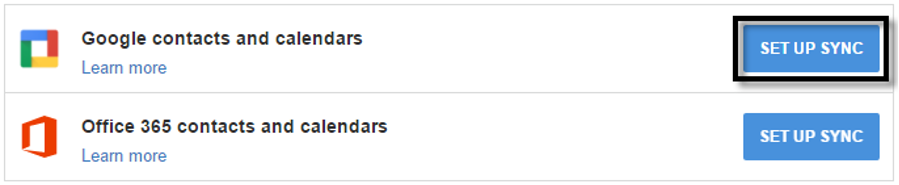
Beside “Google contacts and calendars” click “Set Up Sync”.
On the Google account authorization screen, click “Allow”.
[* If you are already connected to Google, skip to the next step.]
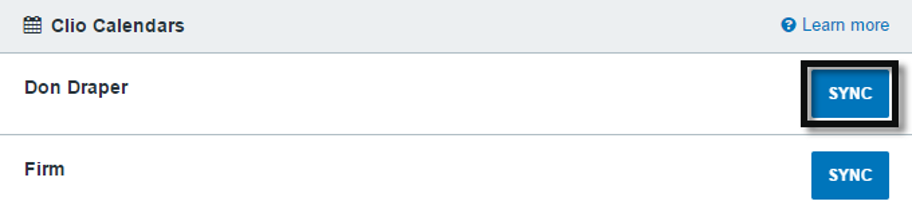
Next, click “Sync” beside the calendar to set up the sync:
You will now choose if you would like to link to a new Google Calendar or an Existing Google Calendar.
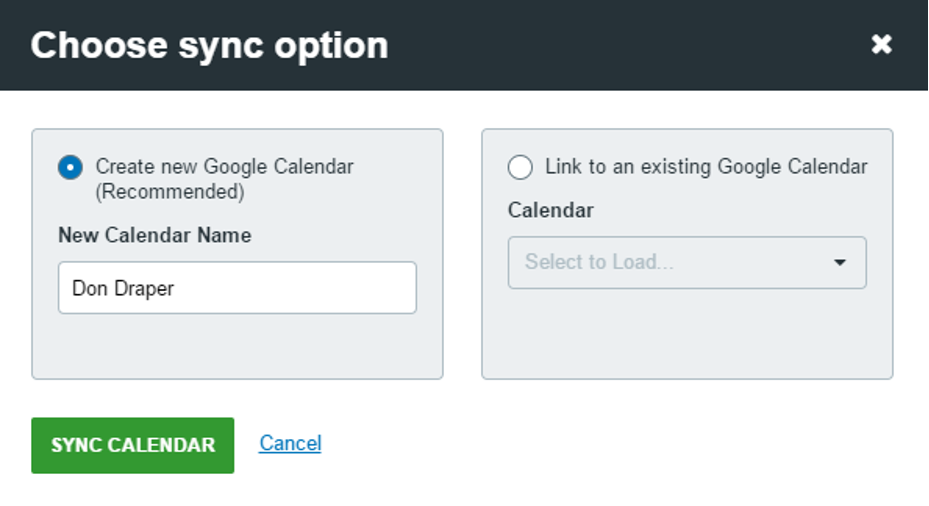
Make your selection and then click “Sync Calendar”.
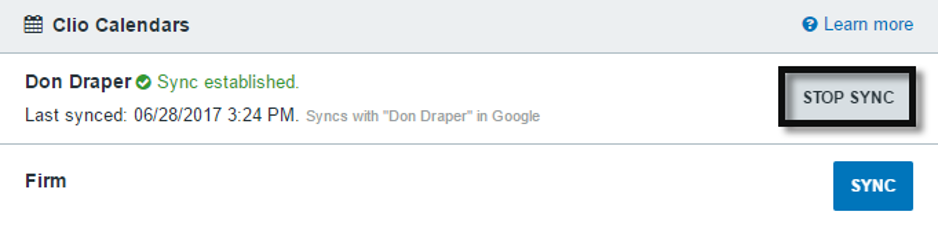
Your Clio Calendar will now be shown as linked to the Google Calendar.
Please be aware that the initial sync between Google and Clio may take up to 24 hours (although it typically takes 1-2 hours).

Removing the Link to a Calendar
If you want to stop the sync to a particular calendar, go to the Google sync settings screen in Clio and click the “Stop Sync” button beside that calendar.
Syncing the Firm calendar
Syncing the Firm calendar to Google follows the same steps as detailed above except that only the Primary Subscriber can sync the Firm calendar.
Once the Firm calendar is synced, the Originating Subscriber can make changes to firm appointments where the firm is the creator of an appointment (not attendee).
If you wish to share the Firm calendar, the Primary Subscriber can do so from Google – however, only the Originating Subscriber will be able to make changes to the synced Firm calendar.
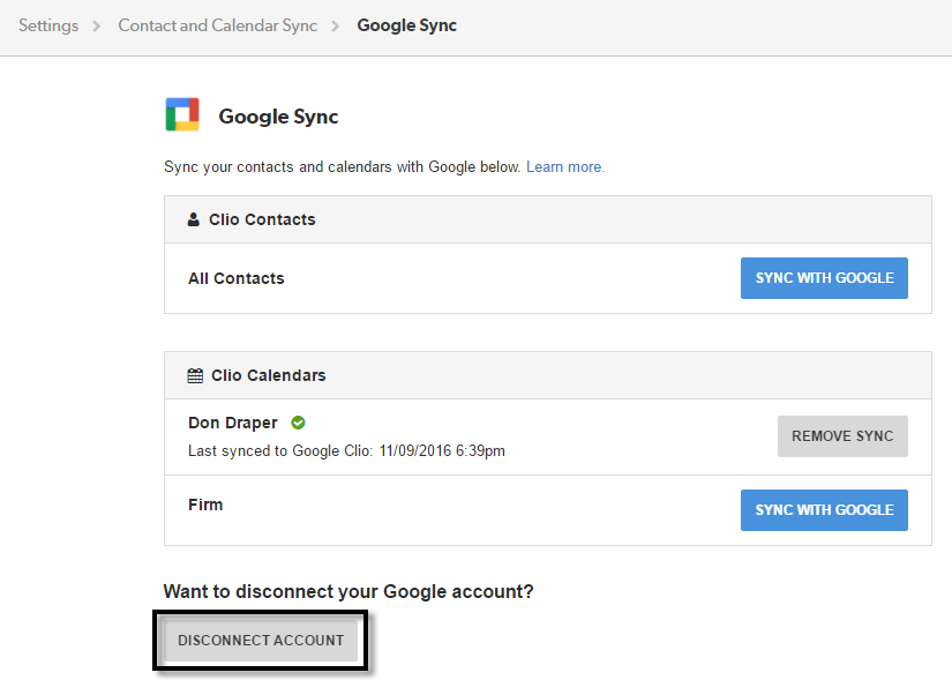
Disabling the Google Sync
Disabling the Google sync will prevent any further syncing. After disabling, no changes to Clio Contacts or Calendars will affect Google Contacts or Calendars (and vice versa).
To disable the Google sync, go to the Google Sync settings page and click “Disconnect Account”.
How to send your Clio Scheduler links to Chatagents.com
Please share your Clio Scheduler links by logging into the integration page of your Chat Agents account. To do this, go to https://my.chatagents.com/ in your Chat Agents dashboard and go to “Integrations” which should open https://my.chatagents.com/integrations.
Look for Clio Scheduler and check the “Activate” box.
Then click on the “Help Icon” next to activate and a form should open.
Paste the links you copied from Clio and any messages or special instructions you want to send to our chat agents into this form.
Once you do this, our support team will set it up, usually within 24 hours. Once set up, our chat agents can now start scheduling appointments, either by sharing the link with chat visitors so they can book an appointment with you, or by asking for the details and scheduling your appointment for them.
If you have any questions or need help integrating Clio Scheduler, Clio Manage, Clio Grow or other apps with your Chat Agents account, please contact us through the help section on your Chat Agents dashboard – we will be happy to do it for you, at no additional cost.